Scenario:
You have been asked to design and create a highly available, 3 tier architecture for your company’s new web application.
Verification and Deliverables:
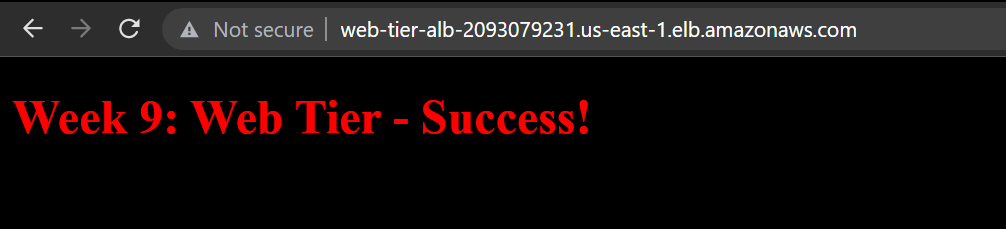
- Make sure you can access the web tier web page from the internet.
- From the web tier verify that you can ping the application tier from the web tier by running the ping command from an EC2 instance in the web tier.
Prerequisites
- An AWS account
- An IAM user with admin level privileges
Objectives – Create the following:
Web Tier
- 2 public subnets
- Minimum of 2 EC2 instances with an OS of your choice (free tier) in an Auto Scaling Group.
- EC2 Web Server Security Group allowing inbound permission from the internet.
- Bootstrap a static web page or create a custom AMI that already includes the static web page.
- Create a public route table and associate the 2 public subnets.
Application Tier
- 2 private subnets
- Minimum of 2 EC2 instances with an OS of your choice (free tier) in an Auto Scaling Group.
- EC2 Application Server Security Group allowing inbound permission from the Web Server Security Group.
- Associate with private route table.
Note: This is not a true application tier as we don’t have any provided code to run on the EC2 instances.
Database Tier
- Use a free Tier MySQL RDS Database.
- The Database Security Group should allow inbound traffic for MySQL from the Application Server Security Group.
- 2 private subnets.
- Associate with private route table.
What is a three-tier architecture?
A three-tier architecture is a software application architecture that organises applications into three logical tiers. Historically, many applications used monolithic architectures, such that if a part failed the whole application would be affected.
Three tier architecture allows for the decoupling of tiers allowing for:
- Faster development, teams could simultaneously work on a tier.
- Improved elasticity and scalability, tiers can scale in and out independently of each other, this is more efficient and cost effective.
- Greater redundancy, the blast radius of any fault is greatly reduced.
The Presentation tier (Web Tier), this the frontend tier which hold the user interface.
The Application Tier (App Tier), this is where the data is processed and any computing logic typically occurs
The Data tier (Database/DB Tier), this is where the data for the application is stored and managed.
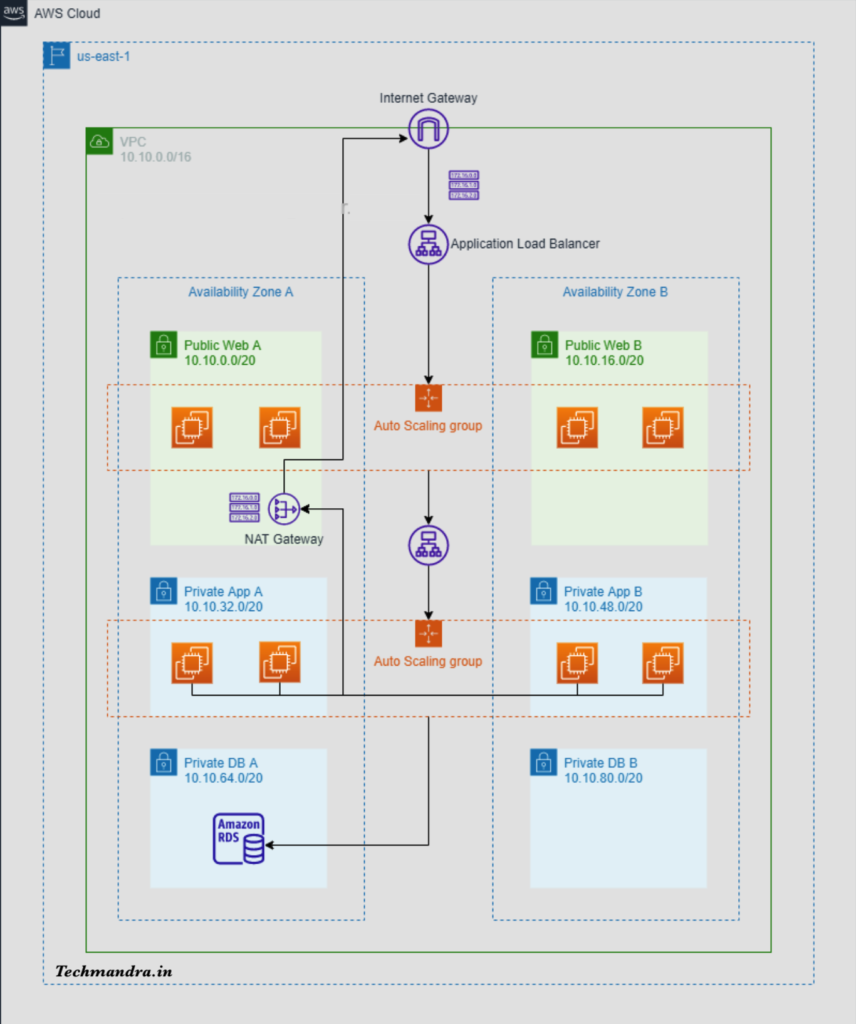
Step 1: Create a custom VPC with 2 AZs, 1 public subnet and 2 private subnets per AZ
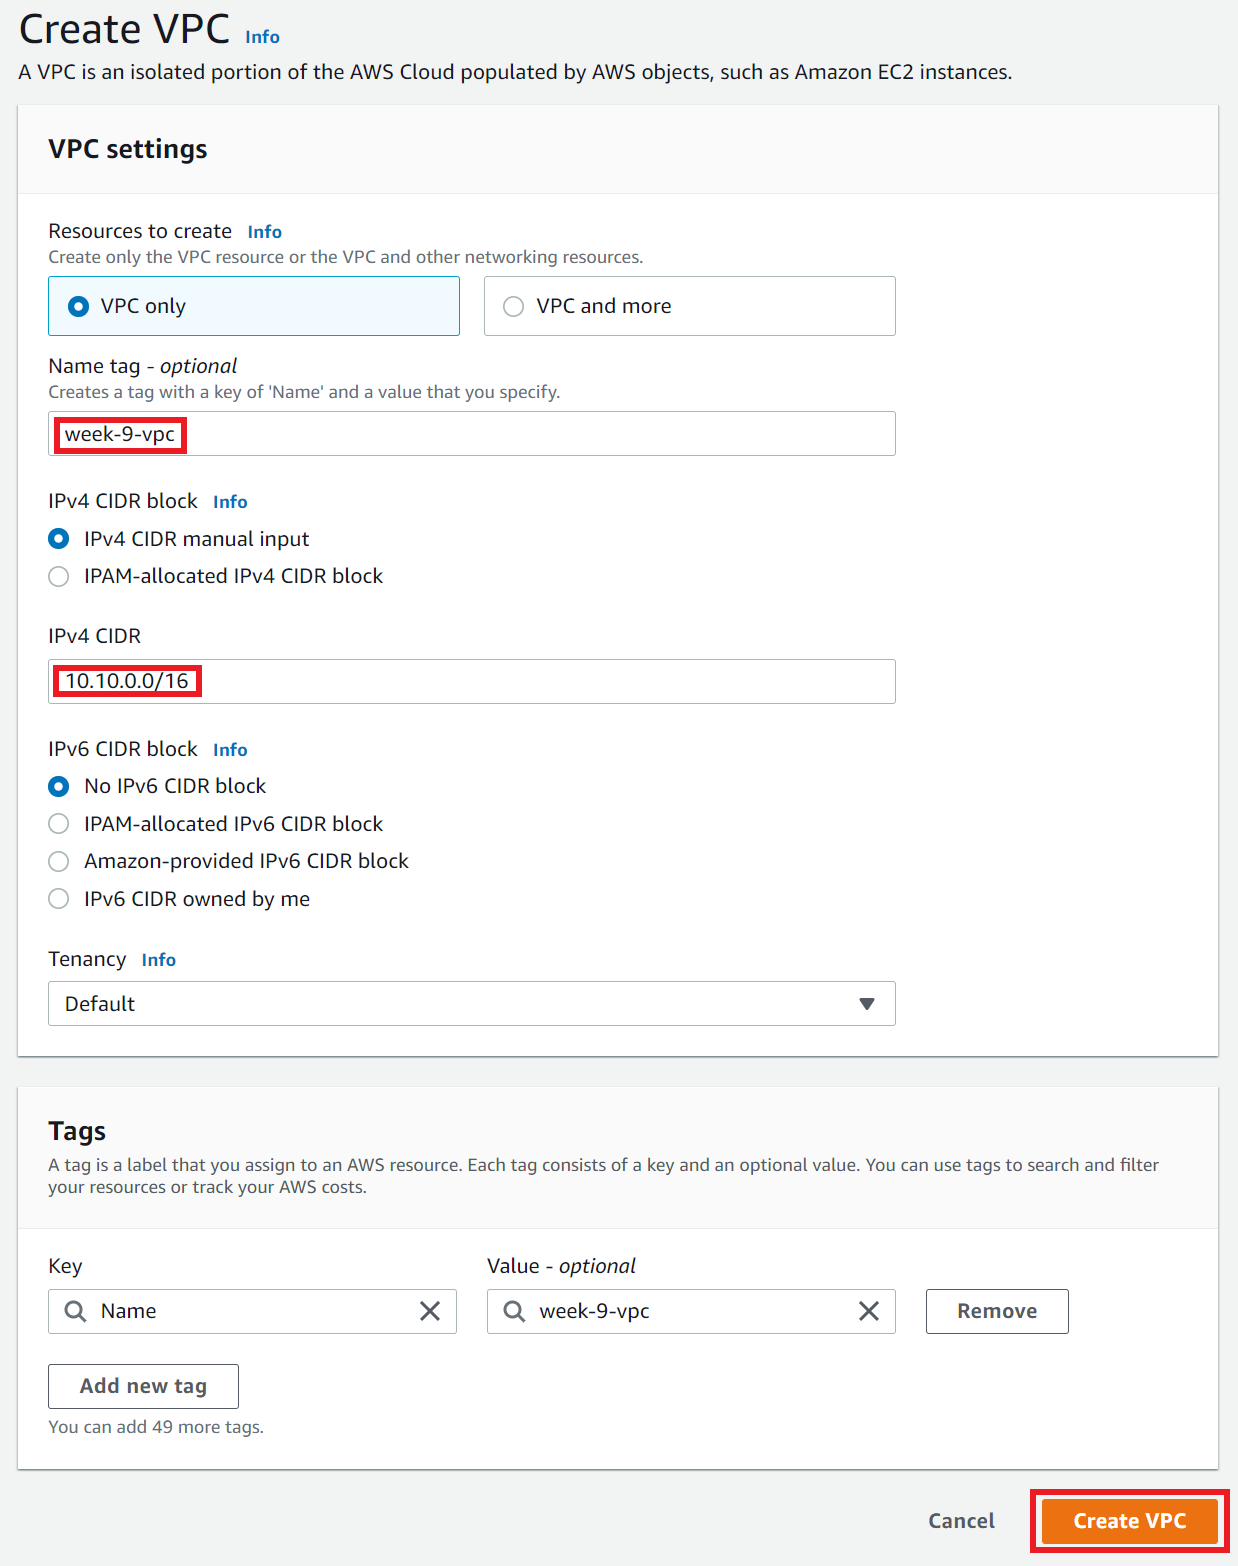
- Create a VPC → Name:
week-9-vpcCIDR range:10.10.0.0/16
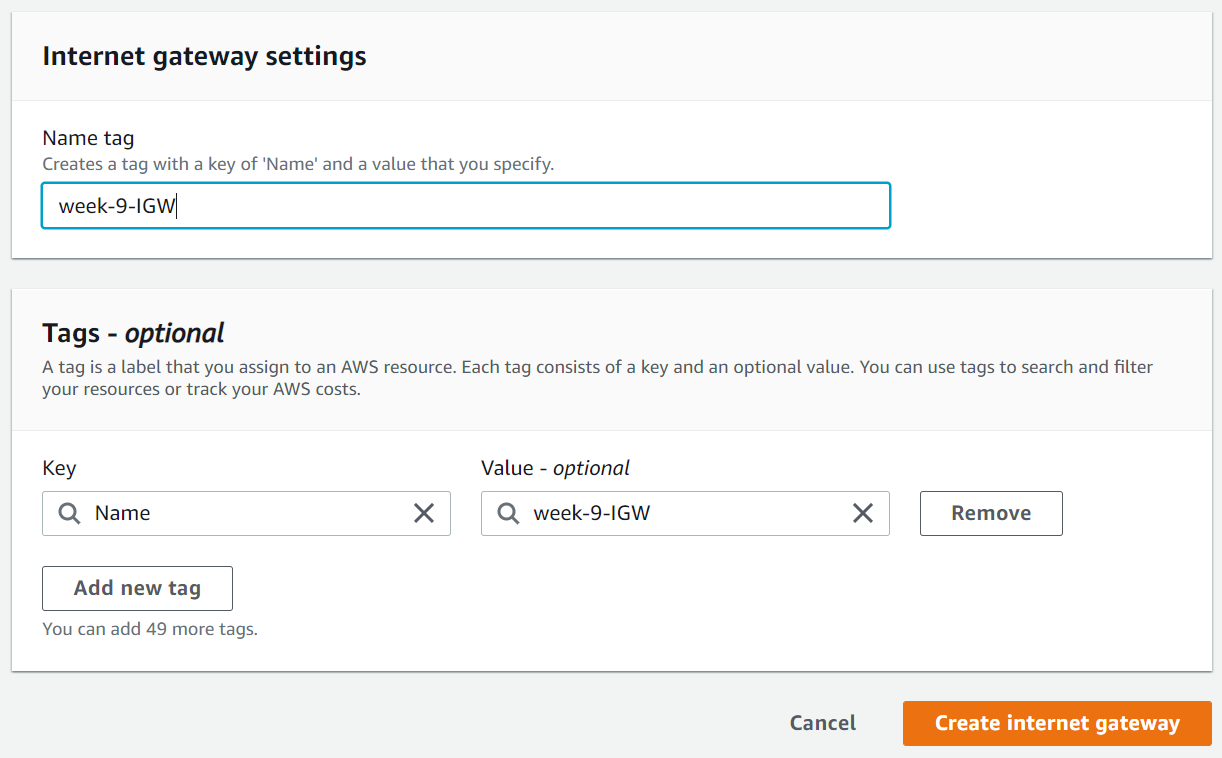
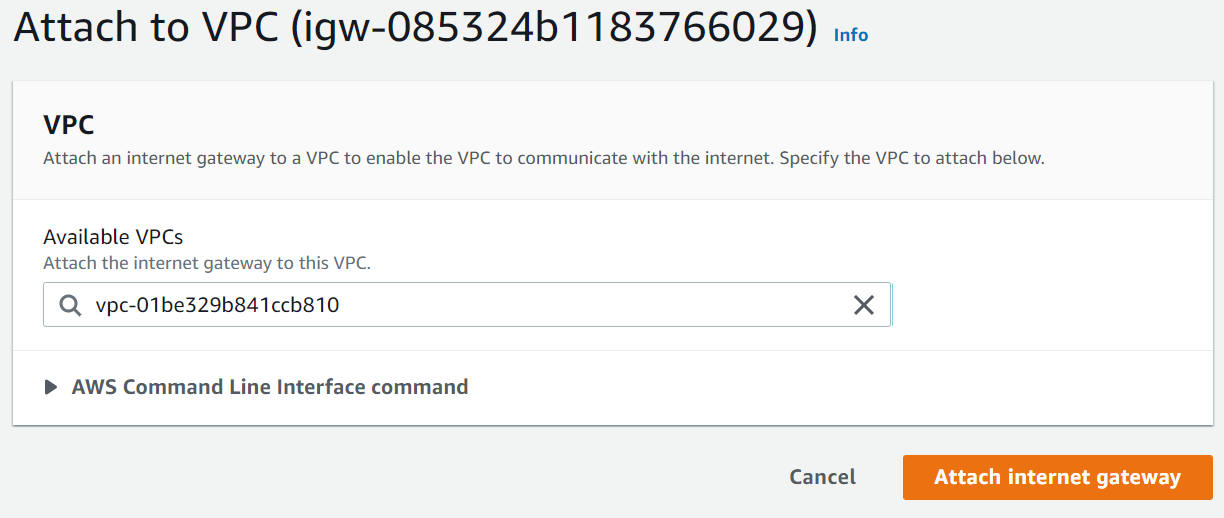
2. Create an Internet Gateway → Attach it to the VPC
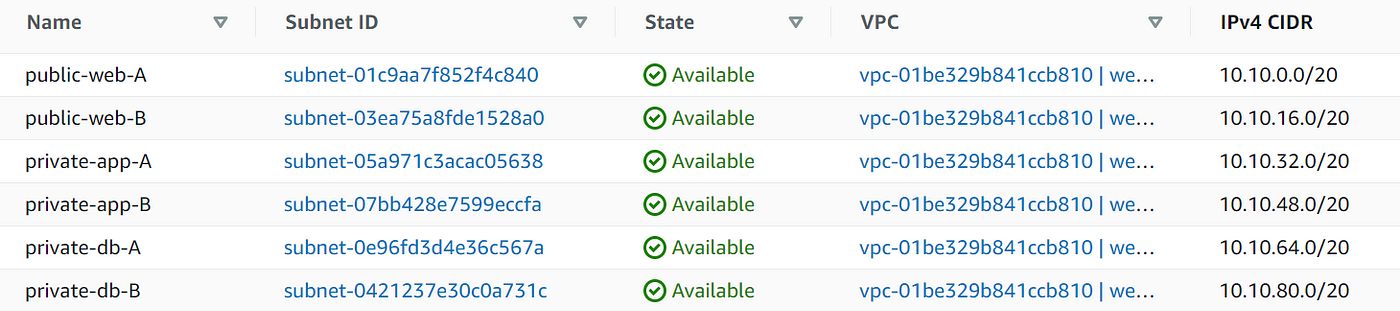
3. Create 2 public subnets for the web tier, 2 private subnets for the app tier and 2 private subnets for the DB tier across two AZs (AZ-A: us-east-1a and AZ-B: us-east-1b)
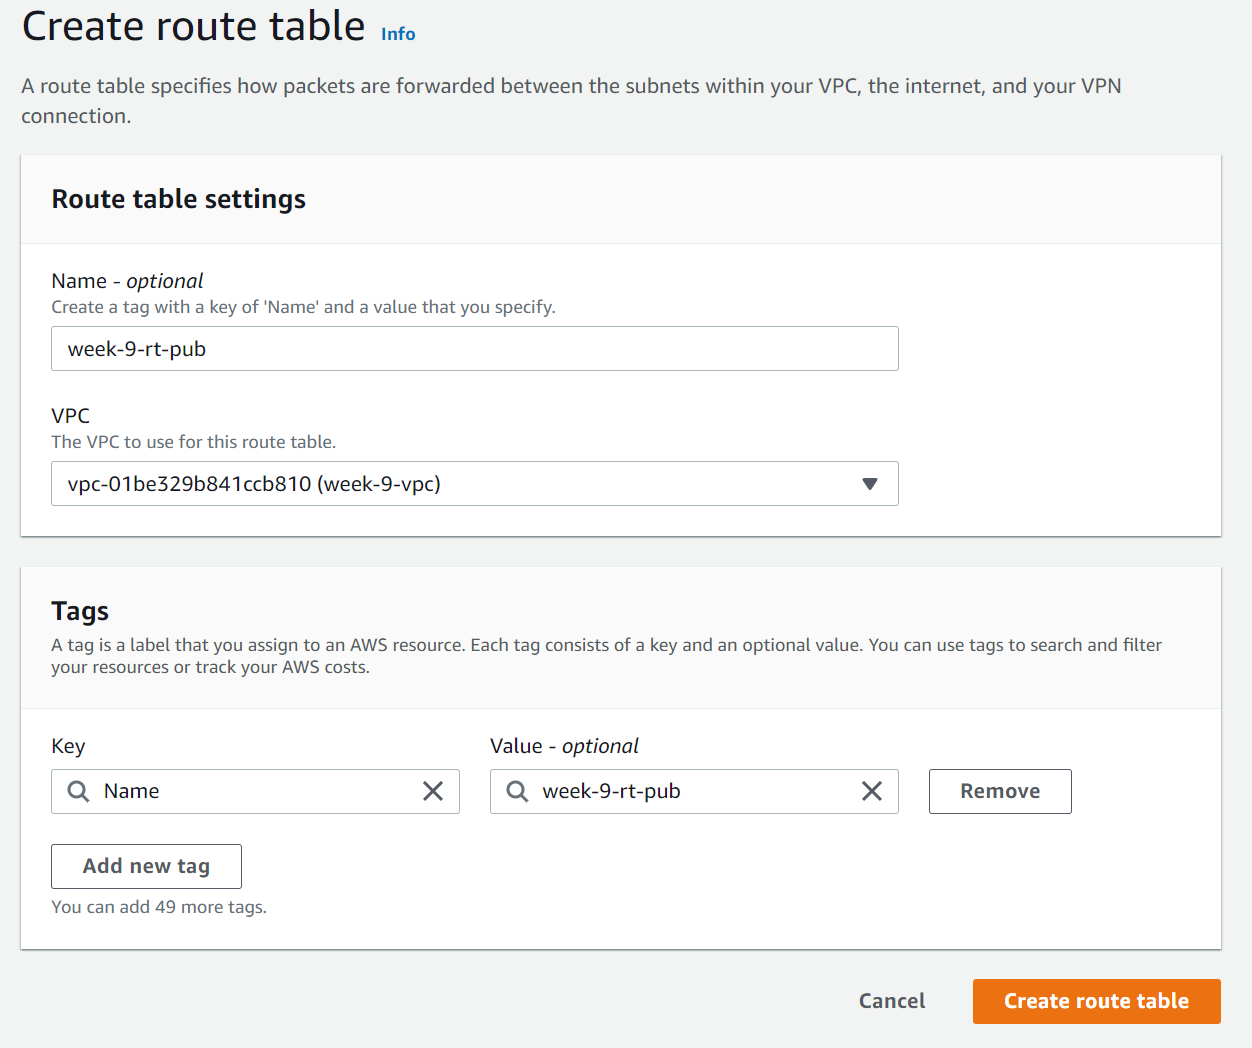
4. Create a Route Table for the public subnets
5. Under Routes → Edit routes → Add route → configure a route to the Destination: 0.0.0.0/0 and Target: Internet Gateway

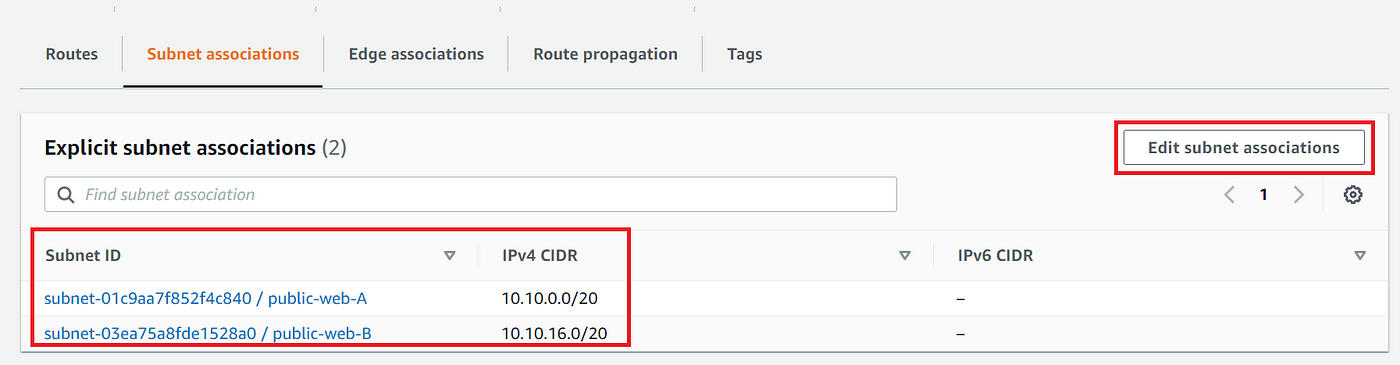
6. Under subnet associations select the public subnets web-A and web-B then click save associations
7. Automatically assign any resources launched into the public subnets with IPv4 addresses
- Under VPC → Subnets select each public subnet (one by one), click on
edit subnet settings. UnderAuto-assign IP settings, check the box forEnable auto-assign public IPv4 addressthen click save.
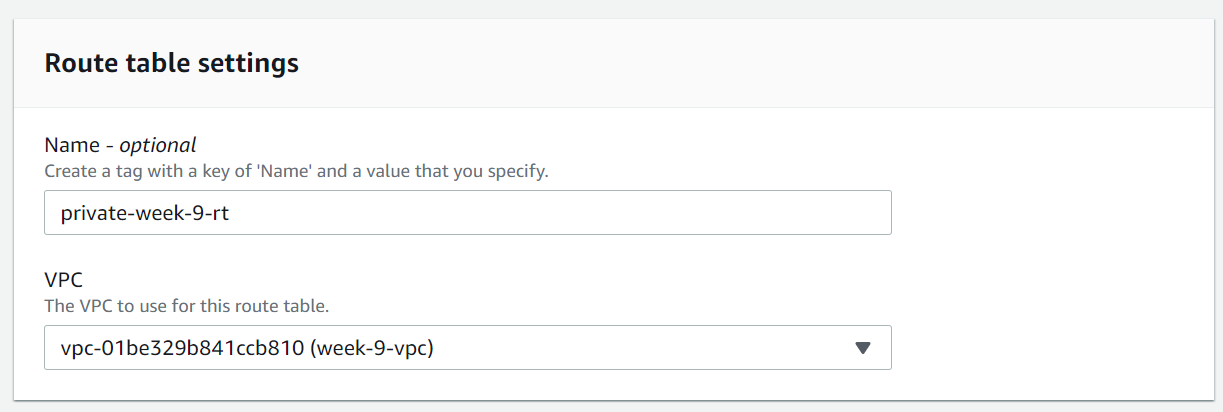
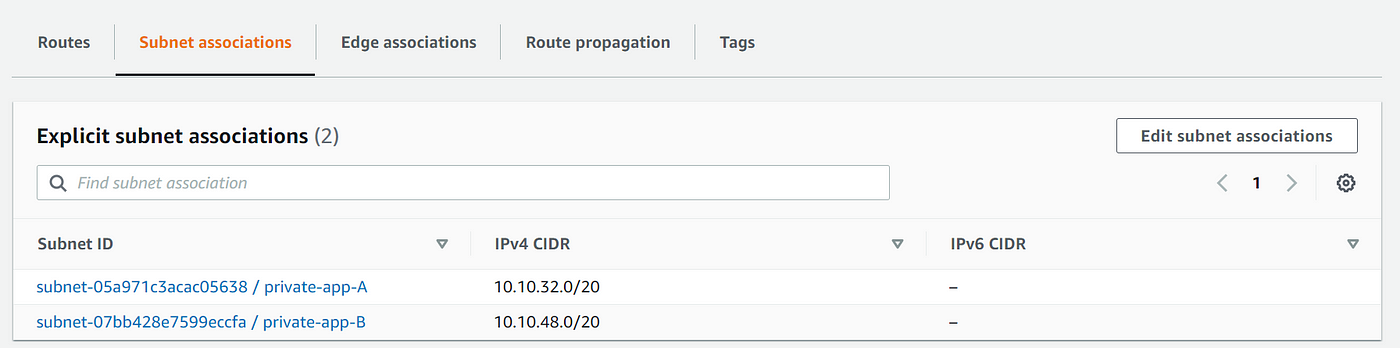
8. Create private route tables with our VPC
9. Associate the app tier subnets to the private route table
Web Tier
Step 2: Create a Launch Template for the web tier EC2 instances
- Navigate to EC2 → Launch template → create launch template
- Name the Launch template web-week-9-LT
- Under quick start → select the Amazon Linux 2 AMI
- Instance type : t2.micro
- Create a security group → Under Inbound security group rules allow SSH and HTTP traffic from anywhere
- Under Advanced details → User data add bash script to bootstrap each instance
#!/bin/bash
yum update -y
yum install httpd.x86_64 -y
systemctl start httpd
systemctl enable httpd
echo '<!DOCTYPE html>' > /var/www/html/index.html
echo '<html lang="en">' >> /var/www/html/index.html
echo '<body style="background-color:black;">' >> /var/www/html/index.html
echo '  <h1 style="color:red;">Week 9: Web Tier - Success!</h1>' >> /var/www/html/index.html
echo '</body>' >> /var/www/html/index.html
echo '</html>' >> /var/www/html/index.html
7. Click Create launch template
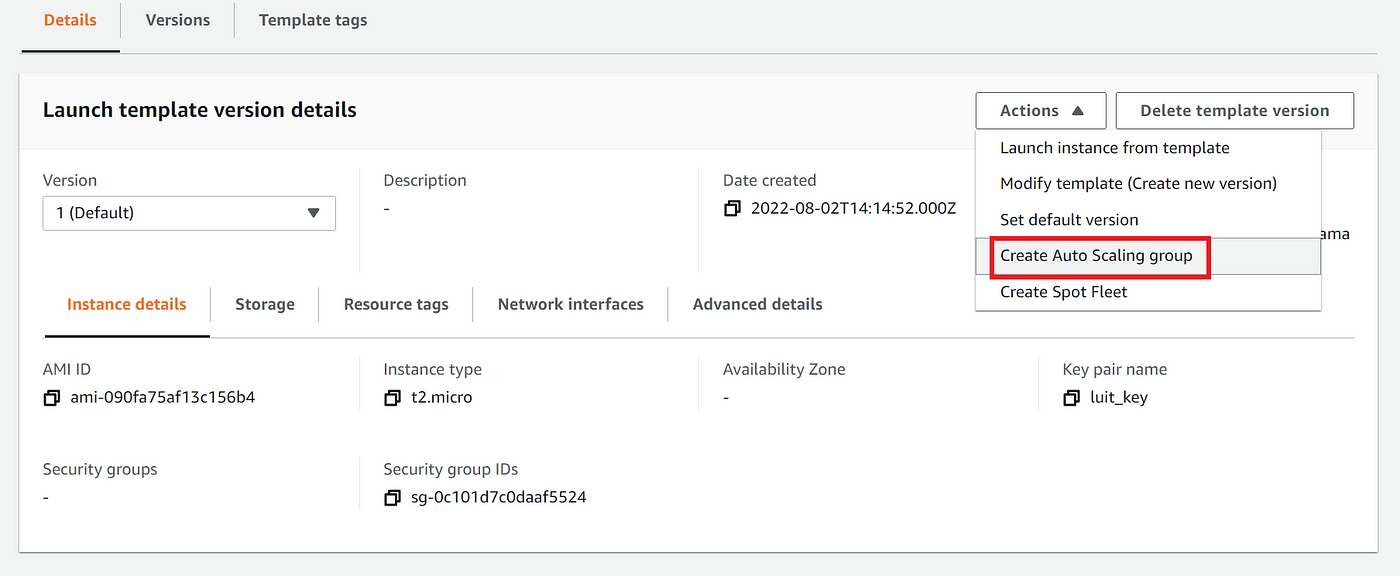
Step 3: Create an Auto Scaling Group
- Under Actions click on Create Auto Scaling group
- Give the ASG a name and click Next
- Under Network → Select the week-9-vpc
- Under Availability Zones and subnets → Select the two public subnets (public-web-A & public-web-B) in AZs us-east-1a and us-east-1b then click Next
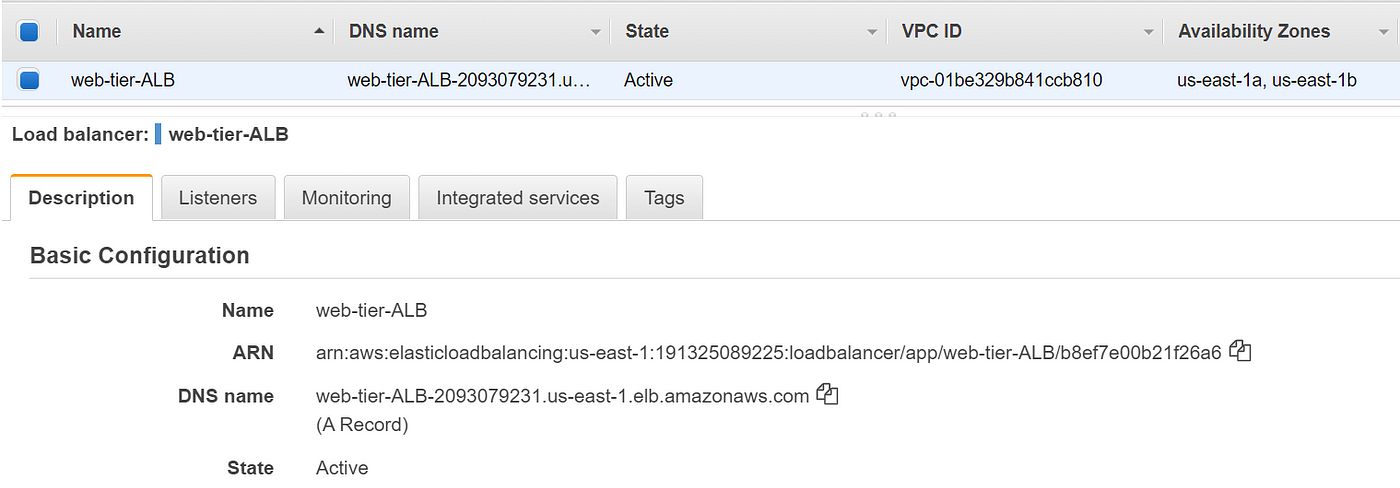
- Under Load balancing select Attach to a new load balancer
- Load balancer type: Application Load Balancer → Load balancer name: web-tier-ALB → Load balancer scheme: Internet-facing → Our VPC and Availability Zones and subnets have been already selected. They should be the public web tier subnets in the week-9-vpc
- Under Default routing select Create a target group → the target group name is the name of the Load balancer
- Under Group size set desired capacity to 2, minimum capacity to 2 and maximum capacity to 5
- Tag new instances with
Key: Name Value: web-tier

Step 4: Verify that you can access the web tier webpage from the internet
App Tier
Step 5: Create a NAT Gateway and Private Route
- Navigate to VPC → NAT gateways → Create NAT gateway
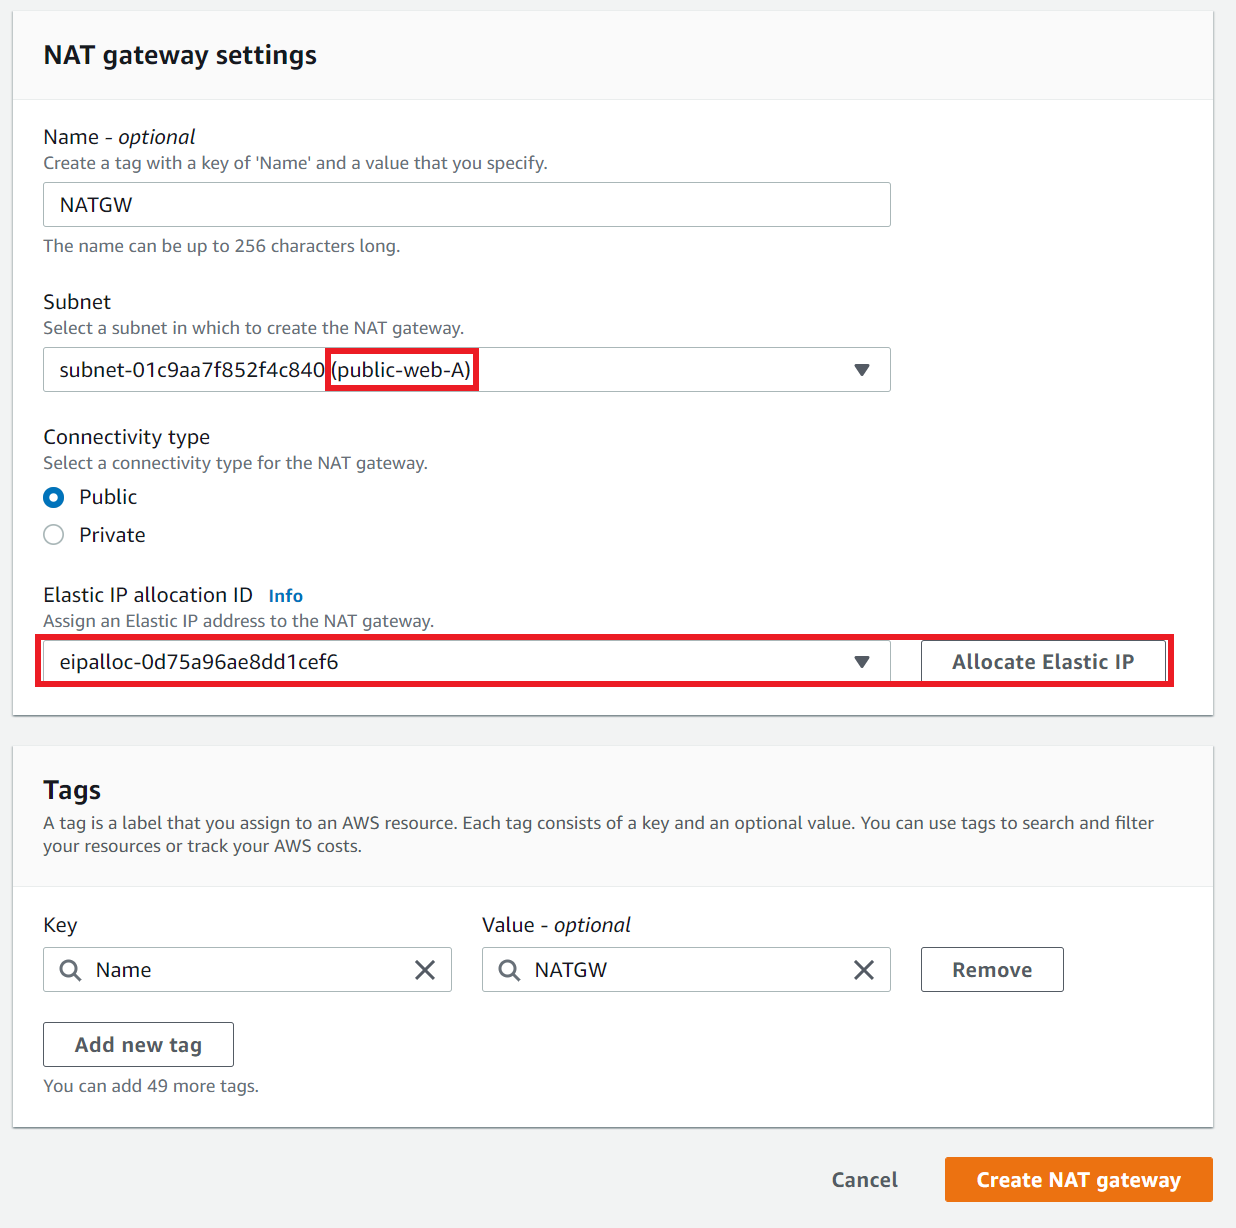
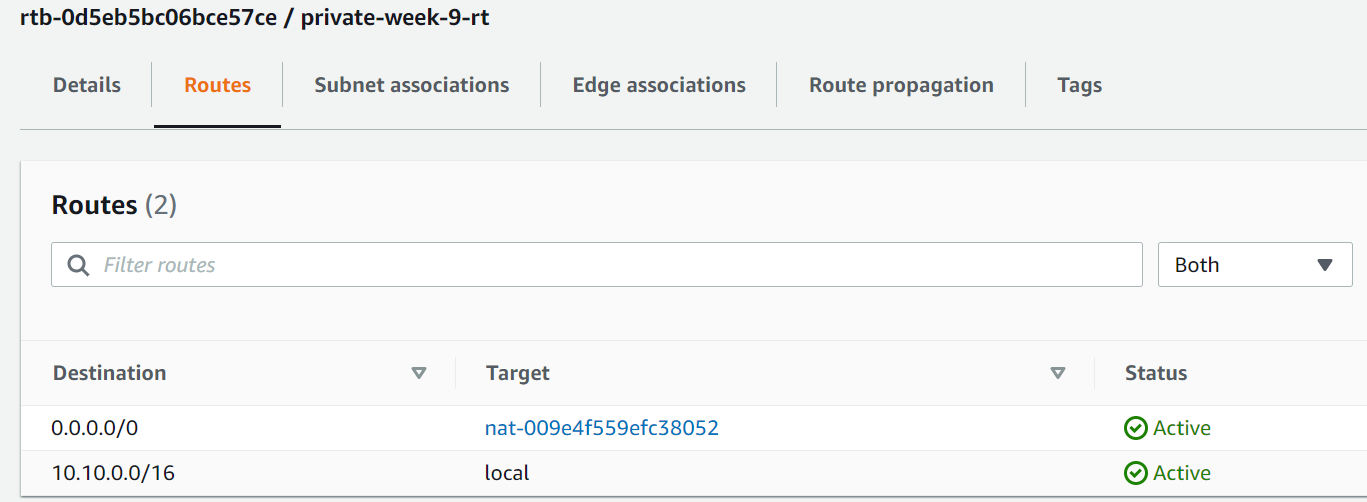
2. Navigate to VPC → Route Tables → Select the private-week-9-rt that we created earlier
3. Click on Routes → Add route Destination: 0.0.0.0/0 and Target: NAT Gateway (nat-009e…)
**Note: For greater redundancy, we could create another NAT Gateway every AZ. However, for the purpose of this follow along we will only create the one NAT Gateway in a single availability zone as this saves costs and stays within the scope of this follow along.
Step 6: Create a Launch Template for the app tier EC2 instances
- Name the Launch template app-week-9-LT
- Select the Amazon Linux 2 AMI, Instance type: t2.micro
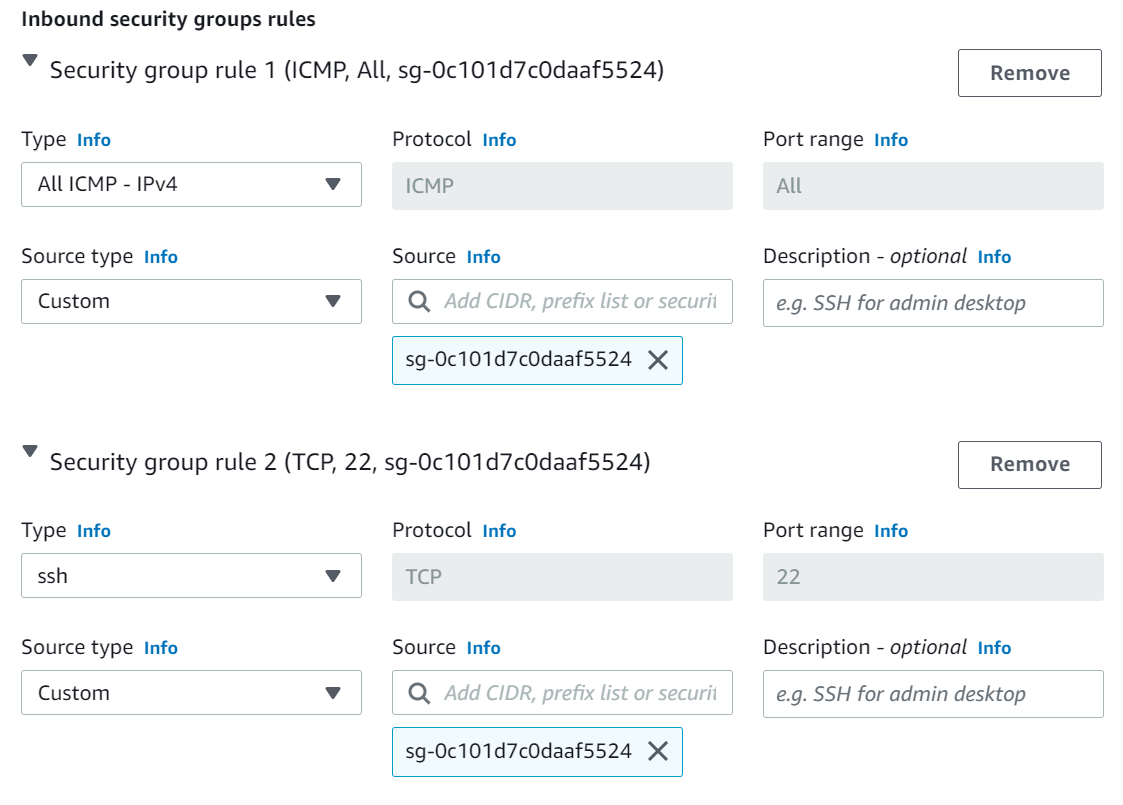
- Create a Security Group to allow inbound SSH and ICMP traffic from the web tier Security Group
sg-0c101d7c...
Step 7: Create an Auto Scaling Group for the app tier
- Create an Auto Scaling group → Name: app-tier-ASG
- Launch template: app-week-9-LT then click next
- Under Network → Select our VPC, select the private app tier subnets from the list (private-app-A and private-app-B)
Now we will configure another load balancer between the web and application tiers for purpose of abstraction.
Step 8: Configure the internal Application Load Balancer
- Under
Configure advanced options→ Select Attach a new load balancer - Load balancer type: Application Load Balancer, Name: app-tier-ALB, Load balancer scheme: Internal
- Create a target group then click next
- Group size → Desired capacity: 2, Minimum capacity: 2, Maximum capacity 5 then click next
- For Tags → Tag new instances → Key:
Name Value: app-tierthis way we can identify the instances launched - Review then click Create Auto Scaling Group
Step 9: Verify that you can ping the app tier from a web tier EC2 instance
- SSH into a web tier instance → ping the app-tier EC2 instances from the web tier. We can ping both web tier instances in both AZs and the internal ALB
ping internal-app-tier-ALB-1446724518.us-east-1.elb.amazonaws.com
ping 10.10.39.28
ping 10.10.63.201

Success! Our app tier is functioning as desired.
Database Tier
Step 10: Create a security group for the database tier
- Configure the inbound rules to allow MySQL/Aurora traffic on port 3306 from the app tier’s security group this will allow traffic between the database tier and the application tier.

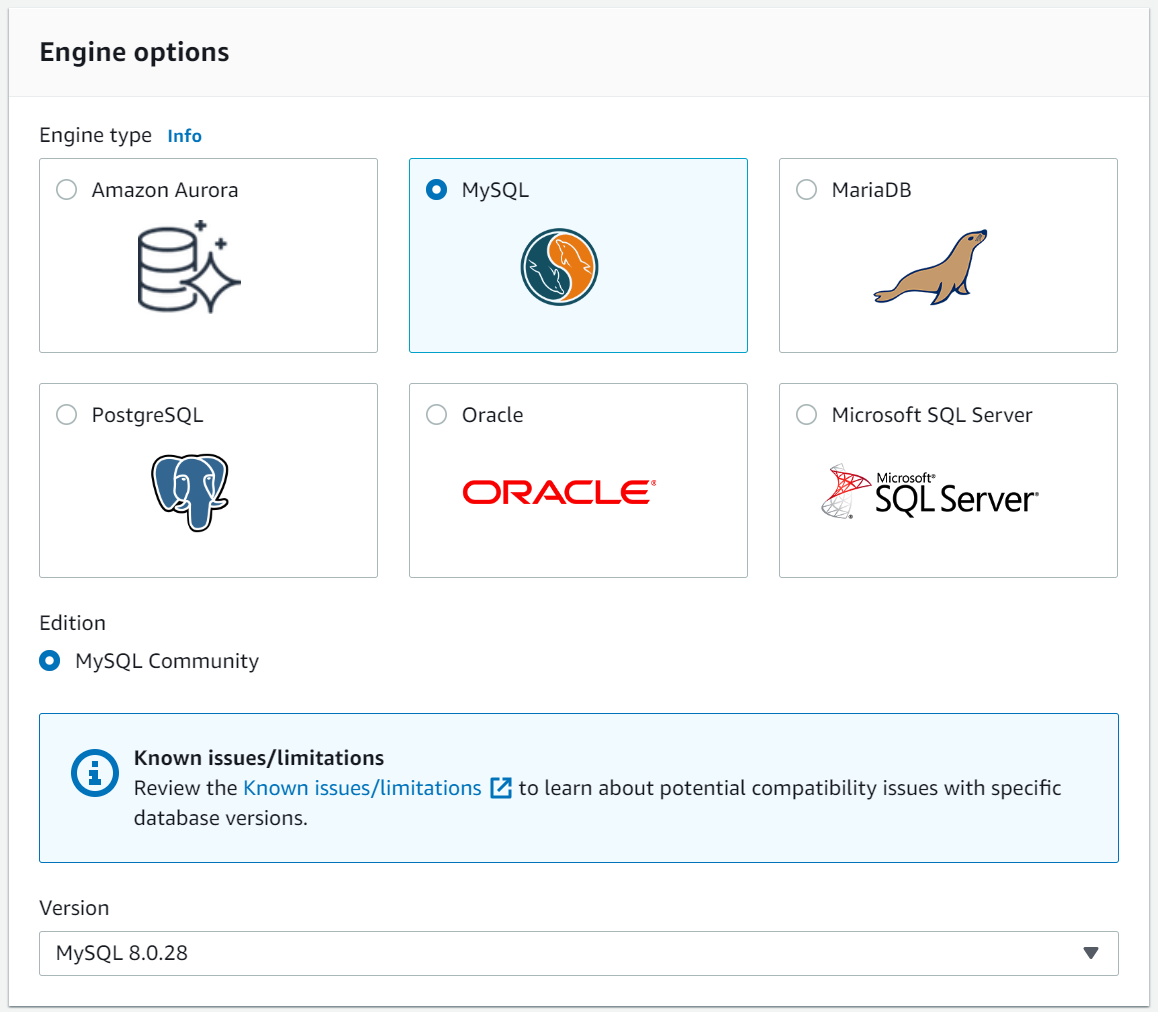
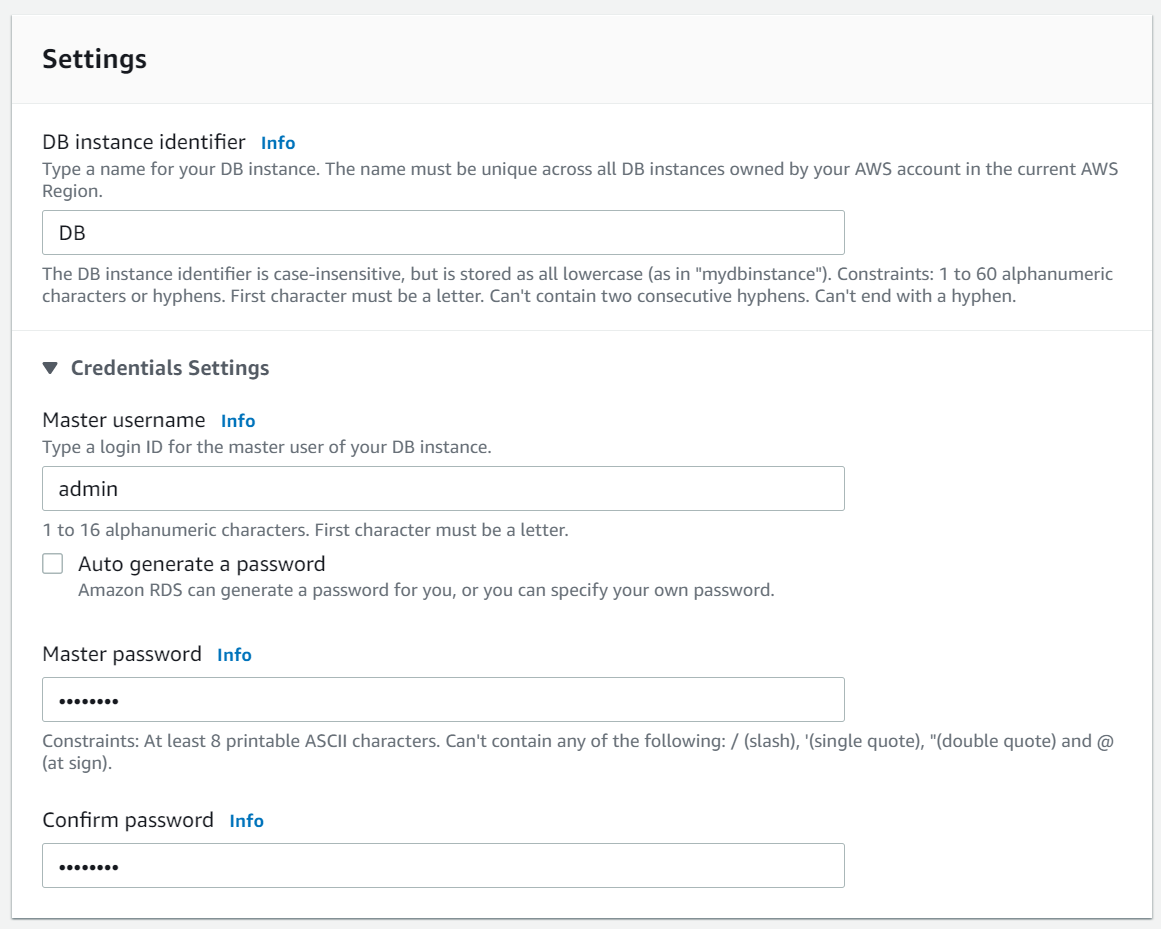
Step 11: Create an RDS MySQL database
- Navigate to the RDS service
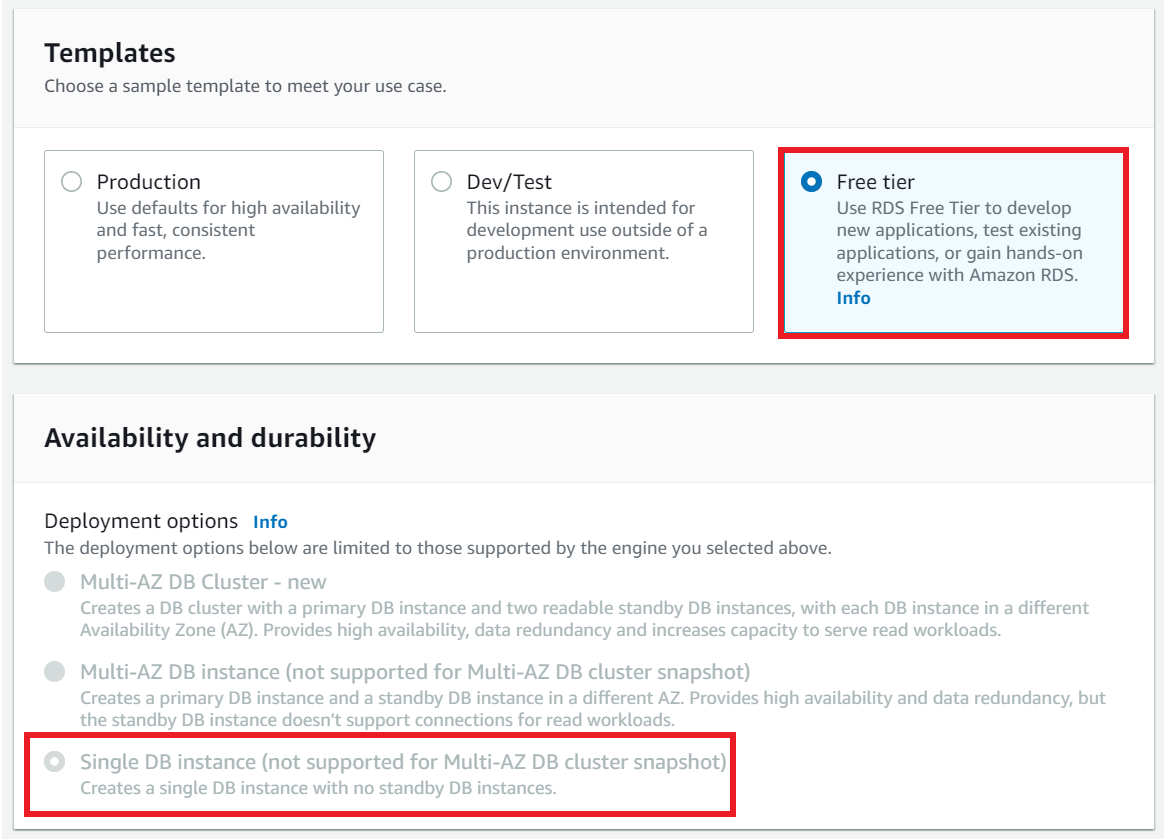
- Click on Create a database, (we will choose the free tier)
- For options and settings, select the following:
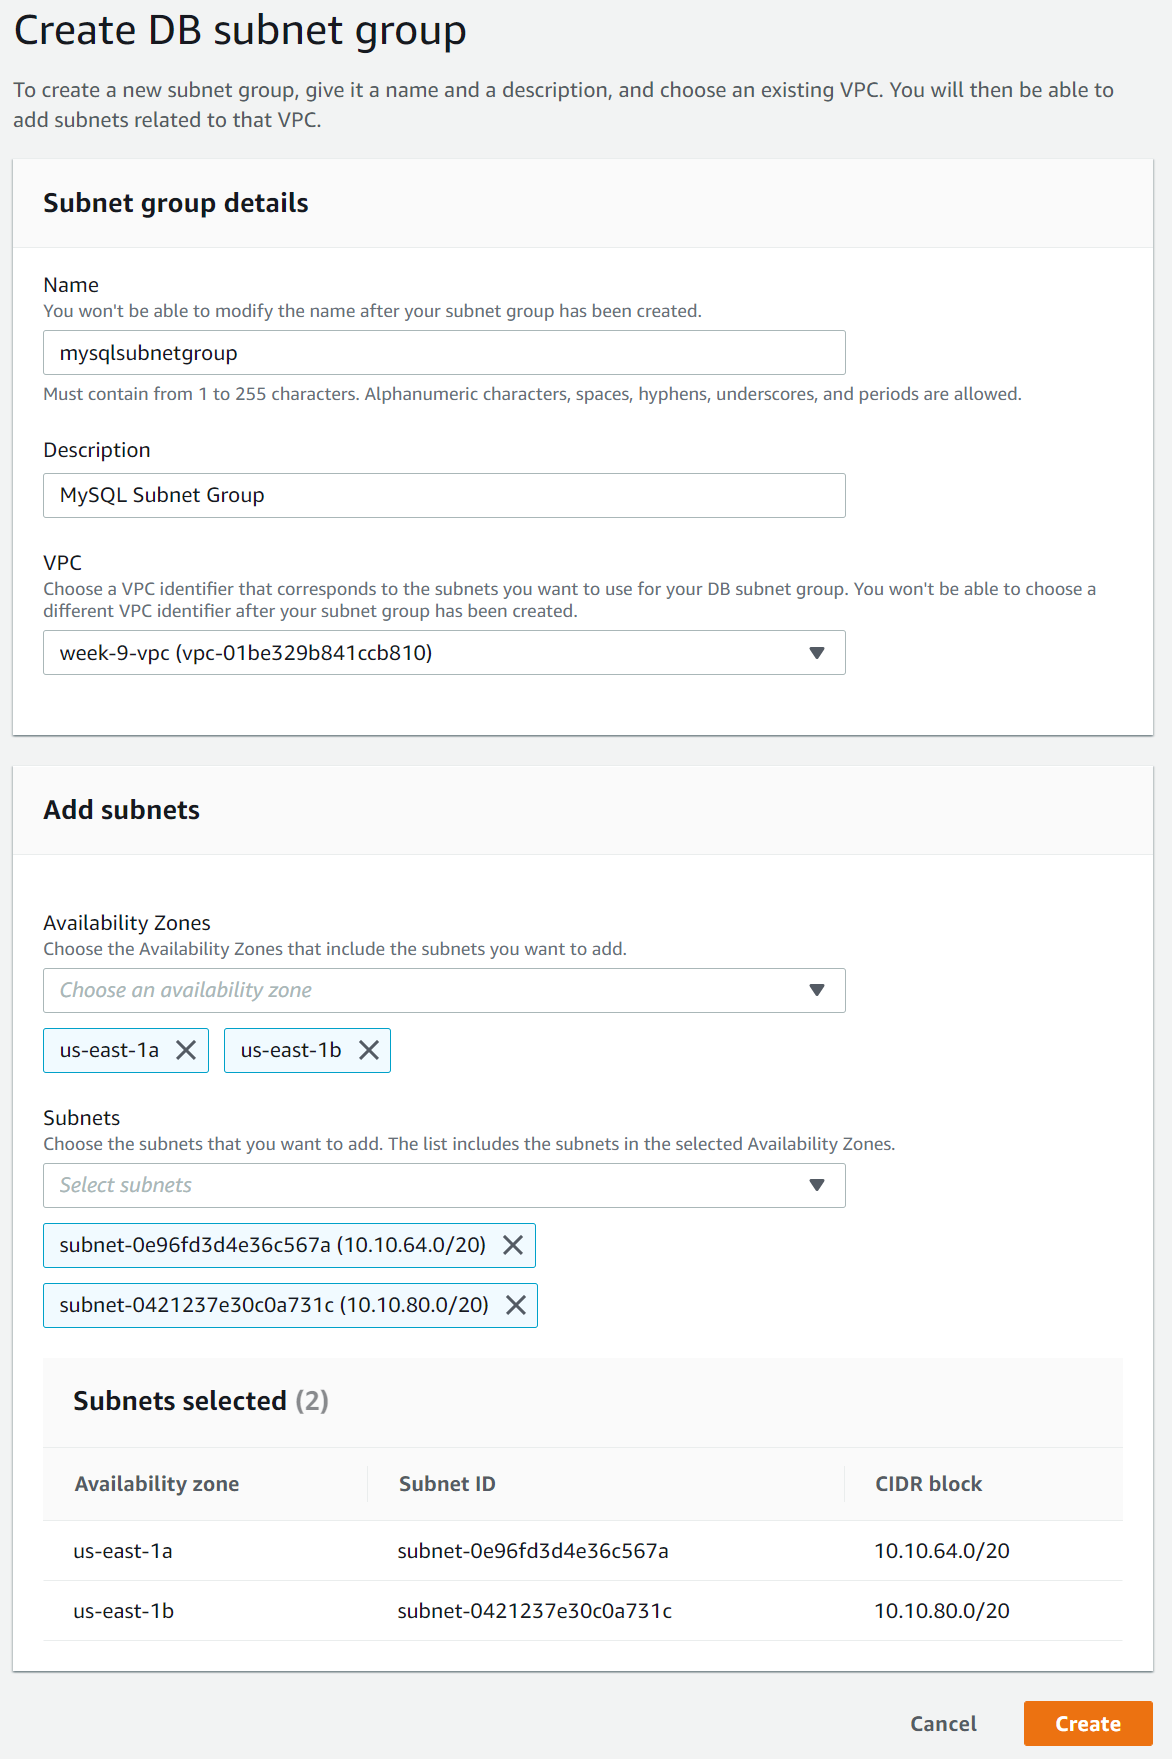
To proceed further we will need to create a subnet group
- In a new tab, navigate to RDS → Subnet groups → Create DB subnet group
- Enter the subnet group details, name, description and VPC
- Under Add subnets select the AZs us-east-1a and us-east-1b
- Select the subnets for the DB tier, in our case its CDIR 10.10.64.0/20 and CIDR 10.10.80.0/20
- Click create
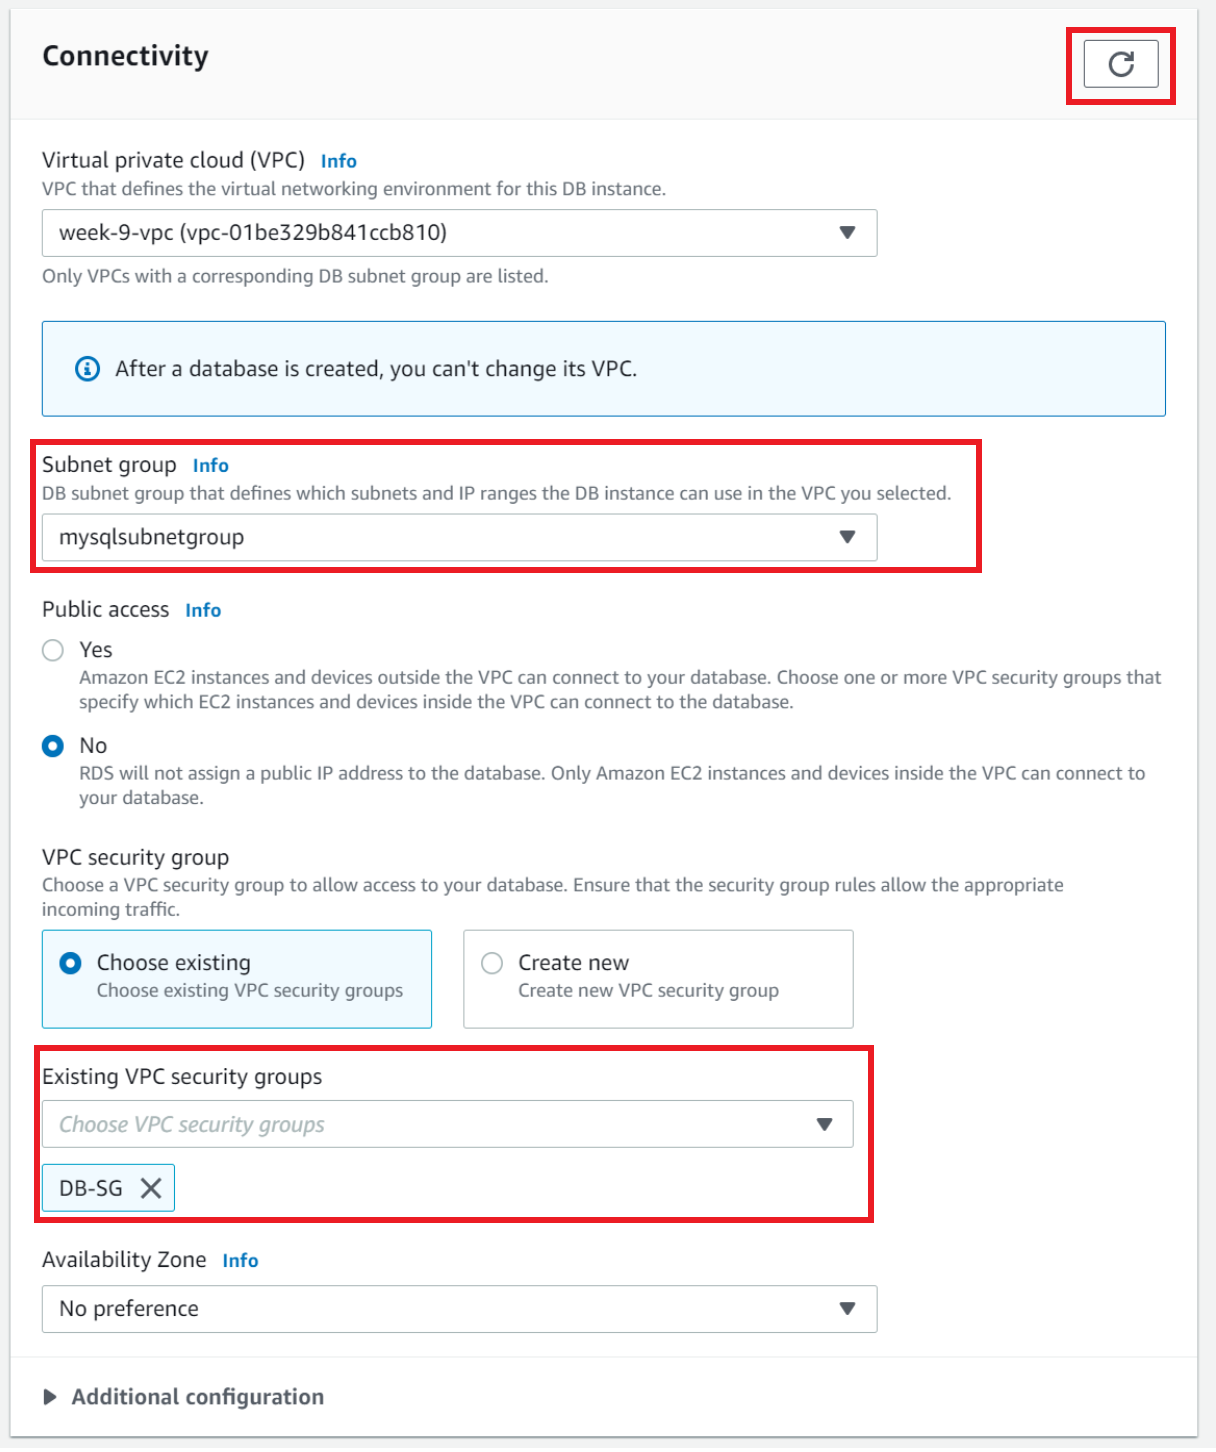
Now we are back to the tab where we are creating the RDS database
- Under connectivity, refresh the section with the refresh button shown below → the subnet group that we created will now appear
- Under Existing VPC security groups, select
DB-SG - Click create
Note: It may take a while to provision
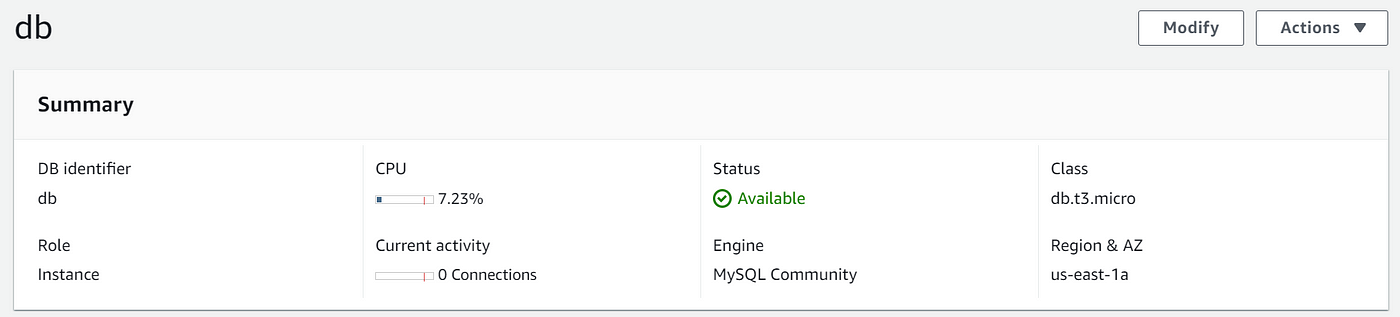
We now have a MySQL RDS database in us-east-1a. However, we only have one database instance in a single Availability Zone. To provide redundancy and high availability, it is best to deploy a standby database instance in a different AZ, we would normally do this in a Dev/Test or a Production environment. Free tier restricts us to using a single DB instance with no standby instance.
We have created a 3-tier highly available architecture. To make it fully highly available and more redundant, we would deploy an RDS database with Multi AZ.

Leave a Reply