Prerequisites
There are a few things that I already have in place to support this guide, and therefore I won’t include detail on creating these particular elements, which are:
- An AWS Account with sufficient permissions in place (DRS, EC2, SSM)
- 2 VPCs, each in a separate region (I’ll be using default VPCs. London will be my production environment, and Ireland my DR). Each VPC should have:
– A public subnet with associated routes in place to access the internet
– A Security Group that allows HTTP access from the Internet, and all traffic out - An EC2 IAM Role (mine will be named “WebServerIAMRole”) containing the following policies to attach to our Instances:
– AmazonSSMManagedInstanceCore
– AWSElasticDisasterRecoveryEc2InstancePolicy
– AWSElasticDisasterRecoveryRecoveryInstancePolicy
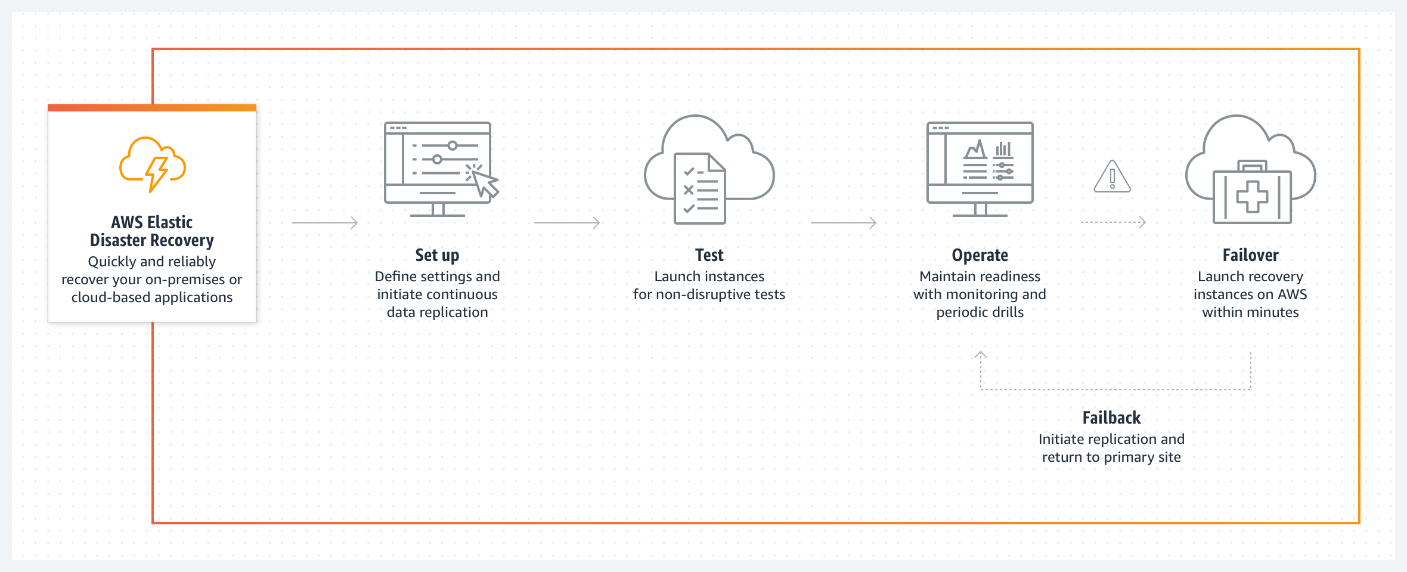
How it works
AWS Elastic Disaster Recovery (AWS DRS) minimizes downtime and data loss with fast, reliable recovery of on-premises and cloud-based applications using affordable storage, minimal compute, and point-in-time recovery.
1. Creating our Production Webserver
I’ll be creating a very simple Linux webserver for this guide. If you already have a server that you want to introduce DRS to, then feel free to skip this step, however please note I’ll be relying on some of the config in place as part of the creation of this instance throughout the guide.
Head over to the EC2 console and select Launch Instance
Give it a suitable name like “MyWebServer”, and use the following options:
- AMI = Amazon Linux 2 AMI (HVM) — NOT Amazon Linux 2023 which it defaults to!
- Instance type = select t2.small — we need at least a small to provide sufficient /tmp storage for the Elastic Disaster Recovery agent to install
- Key pair = Proceed without (we’ll be using SSM to connect to our instance)
- Security Group = Select existing
WebServersecurity group (or create a new one — details in the pre-req’s section) - Advanced details > IAM instance profile = WebServerIAMRole (see pre-reqs)
- Advanced details > User data = Paste the following code
#!/bin/bash
sudo yum update -y
sudo yum install -y httpd.x86_64
cat > /var/www/html/index.html << EOF
<html><body>Hello!  This is my WebServer in <b>eu-west-2</b></body></html>
EOF
cat > /var/metadata_script.sh << EOF
#!/bin/bash
TOKEN=\$(curl -X PUT "http://169.254.169.254/latest/api/token" -H "X-aws-ec2-metadata-token-ttl-seconds: 21600")
REGION=\$(curl -H "X-aws-ec2-metadata-token:\$TOKEN" http://169.254.169.254/latest/meta-data/placement/region)
echo "<html><body>Hello!  This is my WebServer in <b>\$REGION</b></body></html>" > /var/www/html/index.html
EOF
chmod +x /var/metadata_script.sh
echo "@reboot /var/metadata_script.sh" >> /var/spool/cron/root
sudo systemctl start httpd.service
sudo systemctl enable httpd.service
hostnamectl set-hostname MyWebServer.mydomain.com
The above code primarily sets up a very basic webserver using httpd, and sets the hostname of the instance to “MyWebServer”. We use a cronjob here that runs at startup to update the region in the webpage, so we can see later on whether it’s in London or Ireland
- Leave all other options as default, and wait a minute or two for your instance to become available.
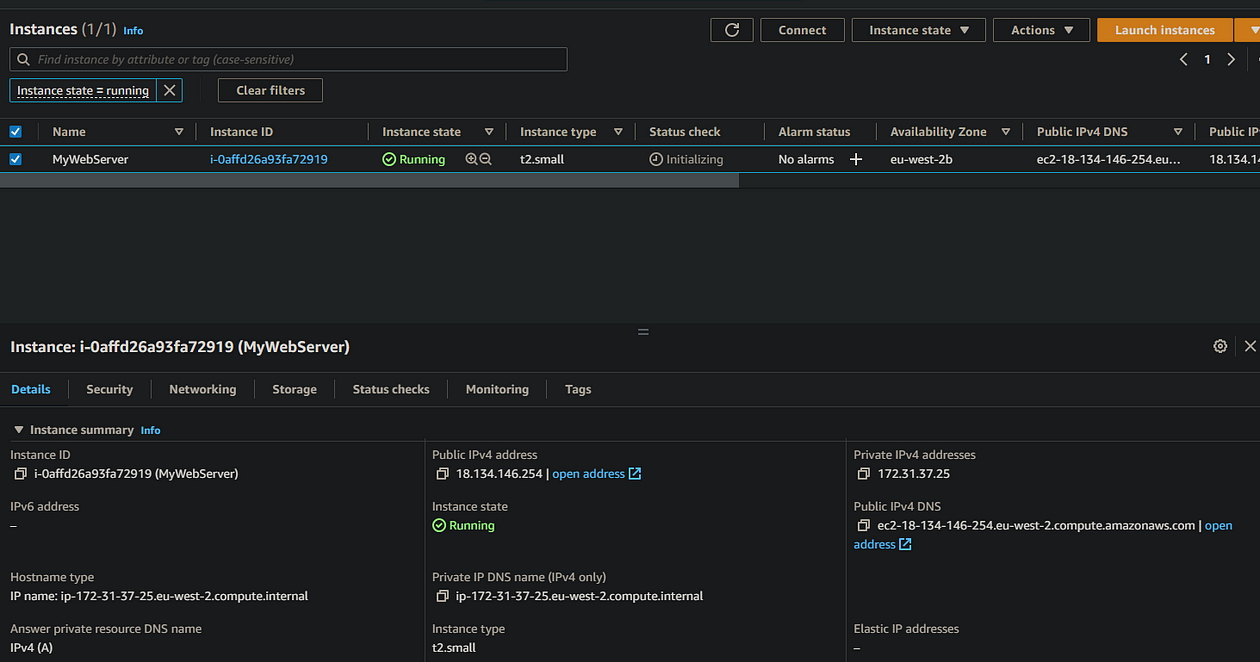
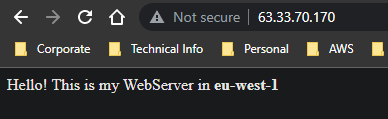
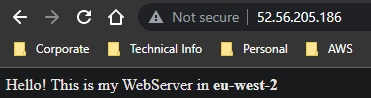
At this point, it’s a good idea to check that the server is operating as expected. So copy the Public IP Address, and make sure it opens in a browser window. It should look something like this:

NOTE: You’ll need to use http://<public_ip_address>, as we haven’t setup SSL so https won’t work and will give you a “Site can’t be reached” or “Timed out” error
2. Setting up Elastic Disaster Recovery Service
Now we have our production webserver up and running, it’s time to get a DRS configured! With DRS, you need to enable it in each region that you want to replicate to. In our example, we’re going to be performing a failover from eu-west-2 (Lon) to eu-west-1 (IRE), and then performing a failback to eu-west-2. Therefore, I’m going to enable it in the eu-west-2 (Lon) AND eu-west-1 (IRE) regions. The process is the same regardless of regions, but just remember that you need to repeat the process in each region.
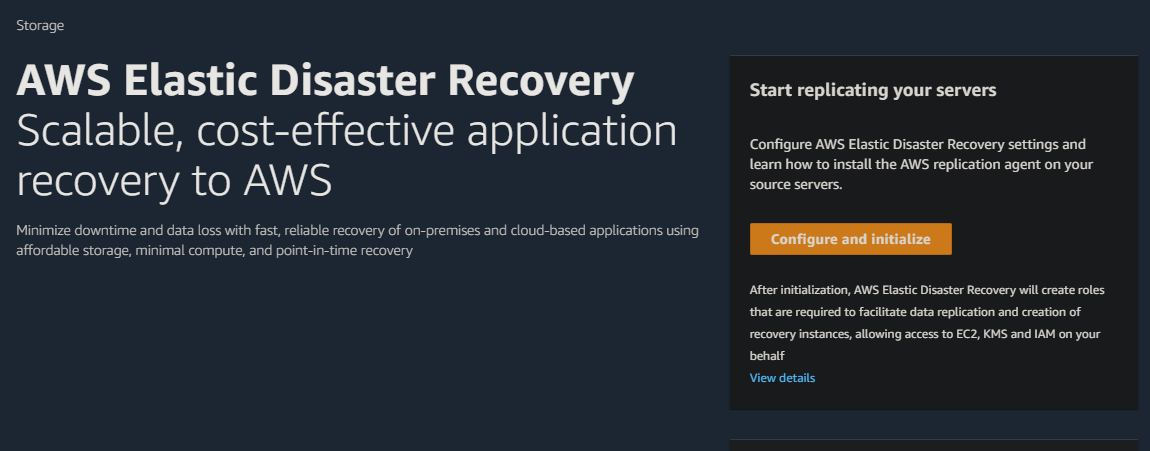
- Head to the Elastic Disaster Recovery console, and select the region you want to failover to (eu-west-1 in my case)
- If this is your first time to the DRS console, you’ll be presented with a welcome screen. Click the Configure and initialize
- On the Set up replication servers screen, select a subnet that will be used to host the replication server, and click Next
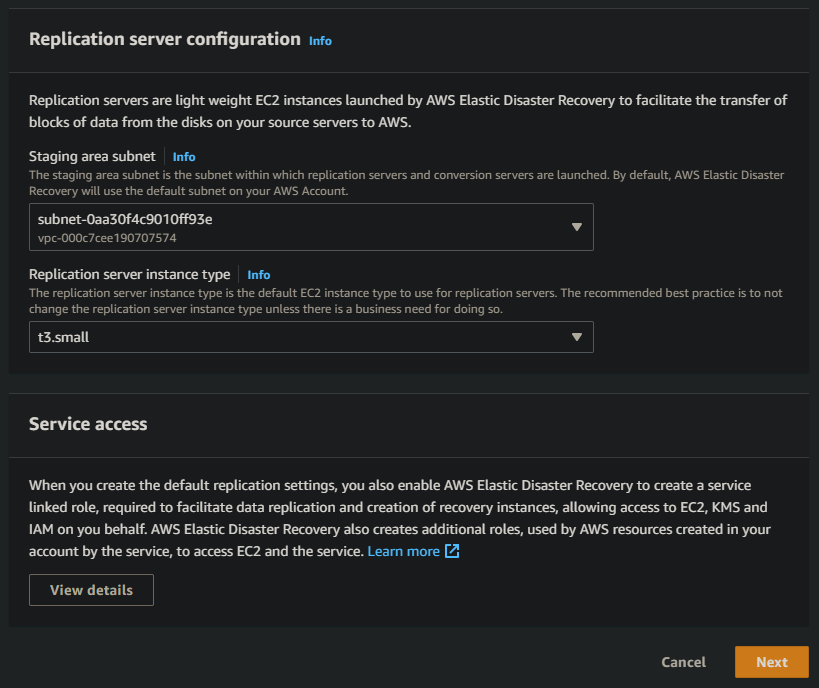
A replication server is simply an EC2 instance that will handle the replication of data between your production resources and your DR resources. Leave the size as default (t3.small) for our scenario, which is the most cost effective instance type and should work well for most common workloads
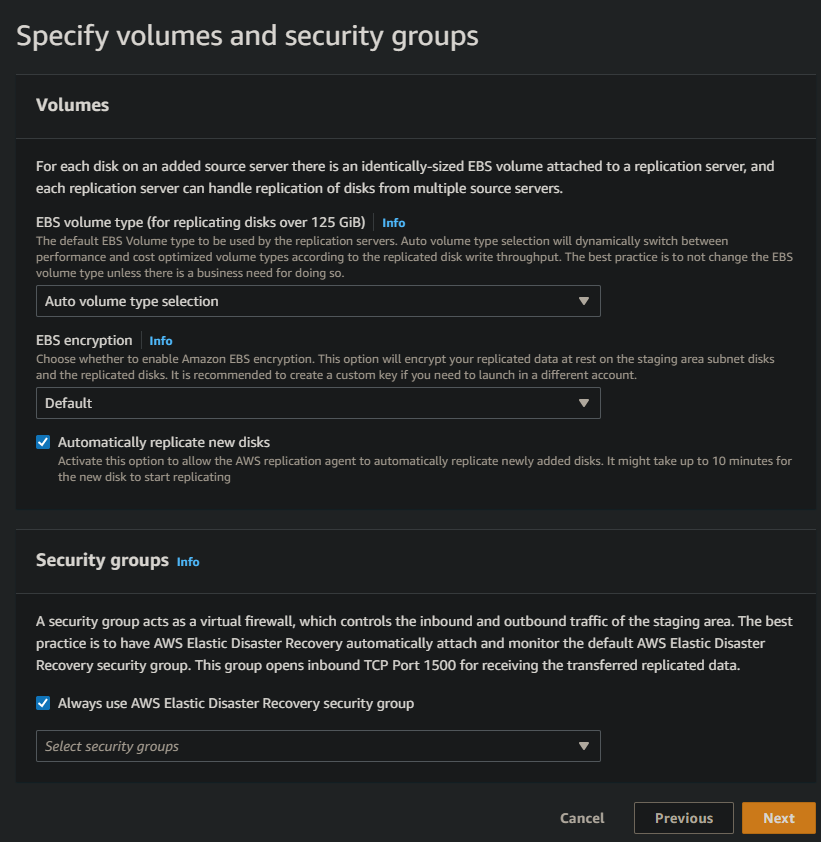
- On the Volumes and security groups screen, leave all options as default, and click Next
- On the Configure additional replication settings, leave all options as default and click Next
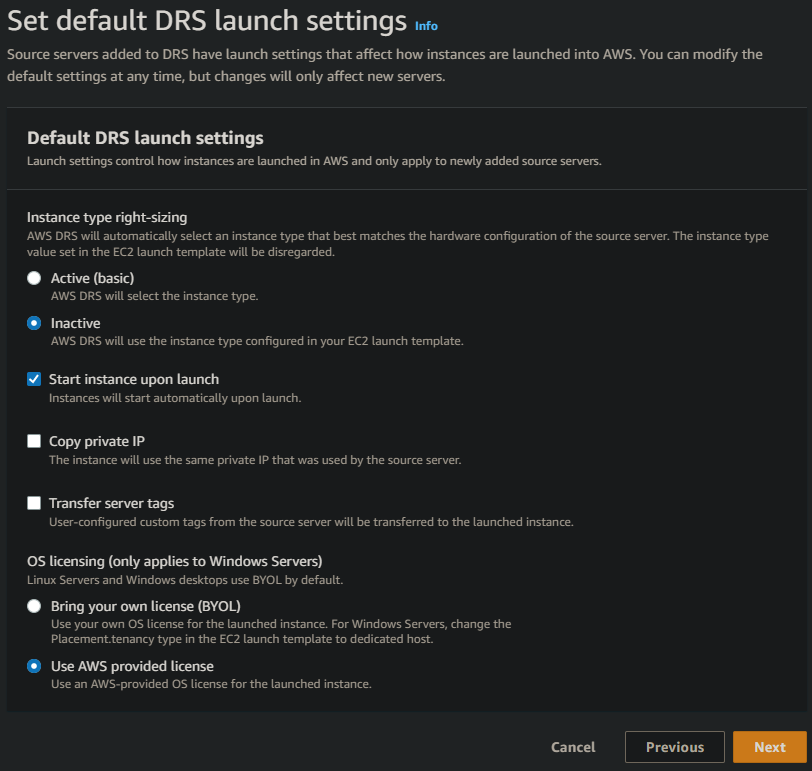
- On the Set default DRS launch settings, change the Instance type right-sizing from Active (basic) to Inactive.
This will avoid DRS attempting to change our instance size in our demo. Ideally, you should be right-sizing your resources regularly, so you shouldn’t need this enabled really, unless you’re perhaps using DRS as part of a migration into AWS from a non-AWS environment.
- Leave all other options as default, and click Next
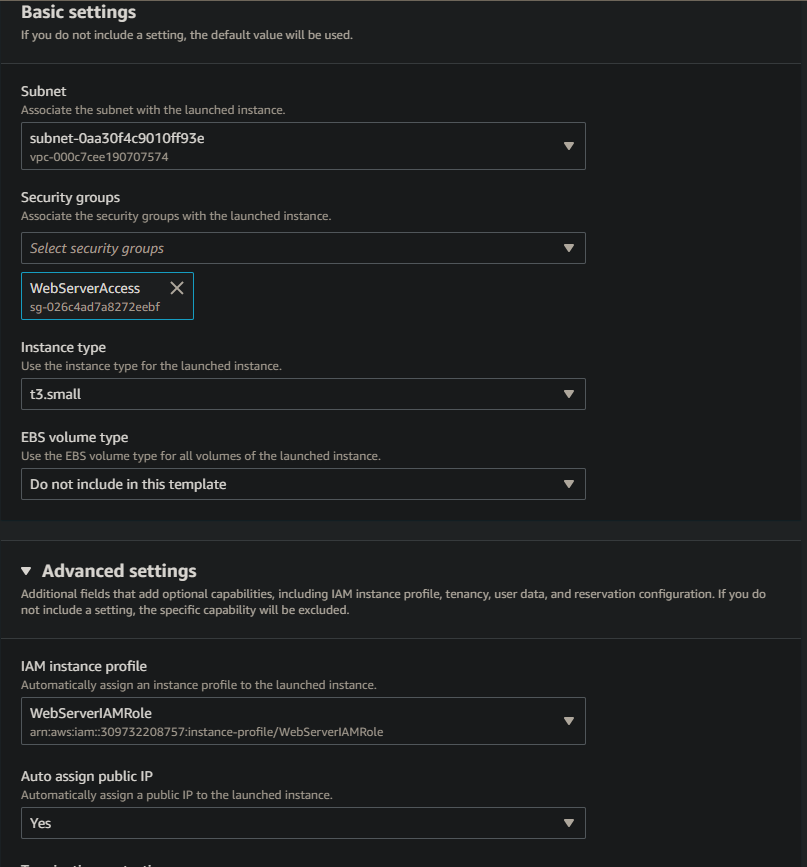
- On the Set default EC2 launch template, set the following options
– Subnet = select an appropraite subnet that will provide your DR resources with the relevant network access
– Security groups = Select our previously created WebServerAccess security group (see pre-reqs section)
– Instance type = t3.small
– Advanced settings > IAM instance profile = select our WebServerIAMRole
– Advanced settings > Auto assign public IP = Yes - Leave all other options as default and click Next
- On the Review and initialize screen, review your options and click Configure and initialize
We’ve now configured the basics of our Elastic Disaster Recovery Service in our failover region.
- Repeat the above steps in your production region (eu-west-2 in my case)
3. Install the Agent on our WebServer and setup replication
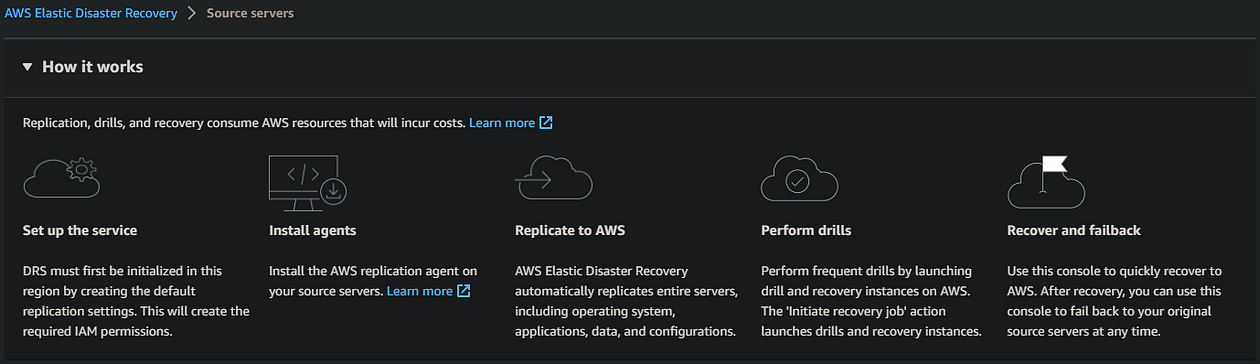
Before anything actually happens within DRS, we first need to setup a source server. This will then prompt DRS to provision a replication server and begin replicating the data from our production region to our failover region. You can view the logical process for this within the Source servers section of the DRS console as below:
- To install the agent on our WebServer, navigate to the Installation instructions by clicking Learn more from within the DRS Source servers console. The specific page we’ll be using in this scenario is the installation instructions for Linux, as shown below:

- Copy the command to download the agent from the install instructions and replace the region in the url with the AWS region into which we’re replicating — which in this case will be eu-west-1
wget -O ./aws-replication-installer-init.py https://aws-elastic-disaster-recovery-eu-west-1.s3.eu-west-1.amazonaws.com/latest/linux/aws-replication-installer-init.py
Keep this stored as we’ll need it next
- In the EC2 console in your production region (eu-west-2), select your running WebServer instance and click Connect

- In the resulting Connect to instance screen, select the Session Manager tab and click Connect
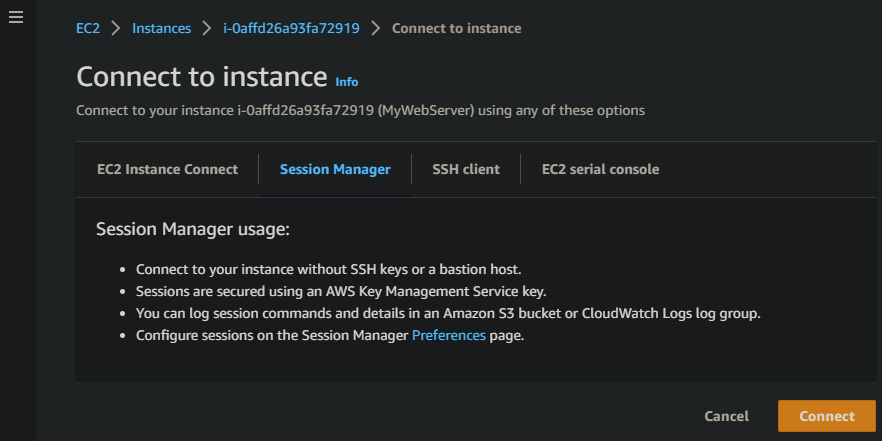
This will then open a secure SSH session to our WebServer instance
- Once connected to the instance, paste the command you copied in the previous step to download the DRS Agent onto the instance. You may need to provide sudo permissions as below

- With the agent downloaded, proceed to install it using the install command from the install instructions
sudo python3 aws-replication-installer-init.py
- Once executed, you’ll be asked to provide a region name, and to confirm which disks you require replicating. Type eu-west-1 (our failover region) for the region and simply press Enter to confirm you require all disks replicating

- The Agent will then proceed to download the relevant data onto your instance and install the Agent. The installation process can take up to 10 minutes or so to complete, after which you should be able to see your WebServer in the DRS Source servers console, as well as the replication instance within the EC2 console that will have been created to handle the replication:

4. Monitoring Replication
With the agent installed and our replication instance up and running, we can then proceed to monitor the replication progress
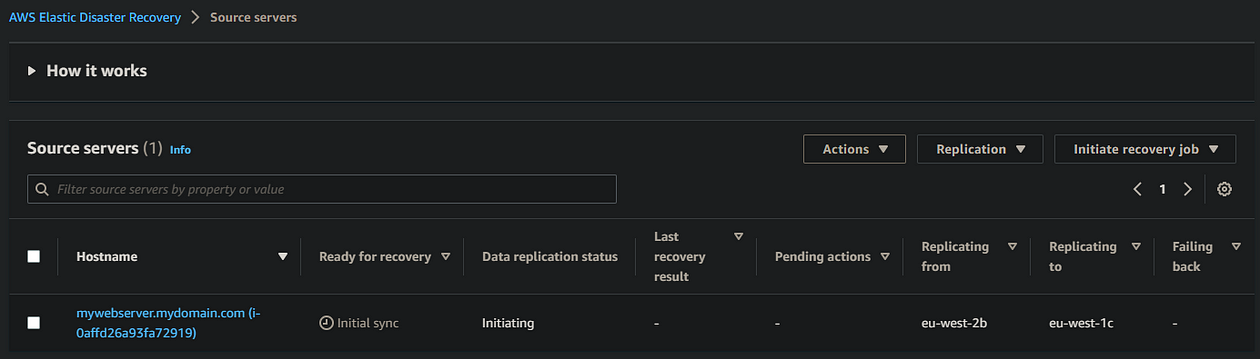
- Head to the DRS console and select the Source servers tab
- Find your WebServer resource and view the progress under the Data replication status column

It can take a further 5–10 minutes after the agent is installed before replication begins, so don’t panic if it seems to be in an
initializingstate for a short while.
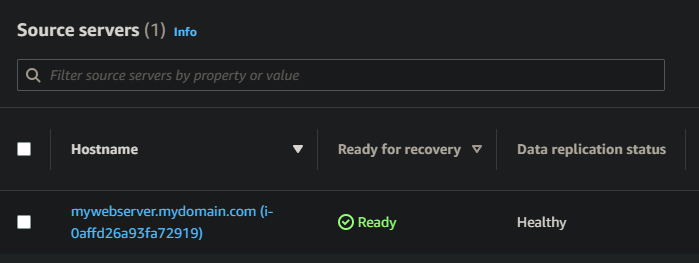
Once replication is completed and the instance shows Ready for recovery, this indicates that the data within our instance in eu-west-2 is now synchronised to eu-west-1, and is ready for us to invoke a DR instance! At this point, no compute is running in eu-west-1. In my scenario, it took around 15–20 minutes from when replication started to it being 100% complete and ready for recovery
5. Testing recovery using recovery drills
It’s all well and good having a system that shows you have instances that are being replicated and are ready to invoke a recovery, but unless you test the recovery and your recovery processes, you can’t guarantee that all will go smoothly when a real DR scenario happens. For this, DRS has a Recovery drill feature, which allows you to test your recovery processes by simulating a recovery without impacting your production workloads. We’ll see what this looks like below
- In the DRS console in your failover region, select the Source servers tab, and select your WebServer instance
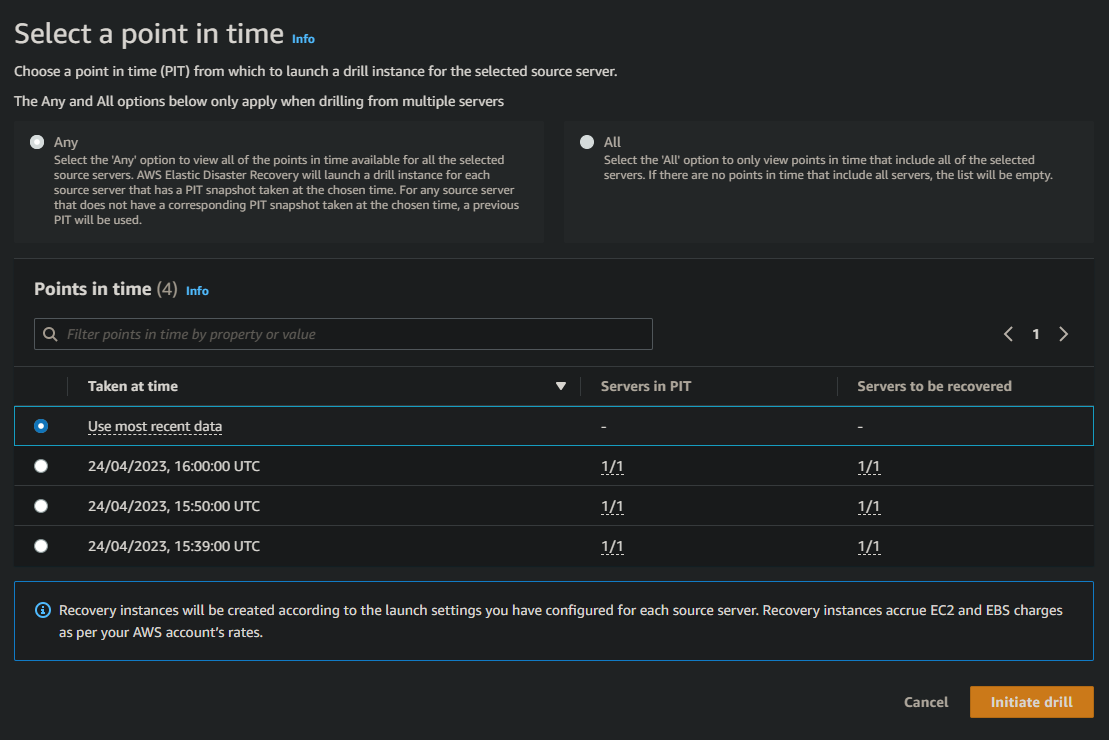
- Select Initiate recovery job > Initiate recovery drill

- Leave the Use most recent data Point in time option, and click Initiate drill
- Click the View job details to monitor progress

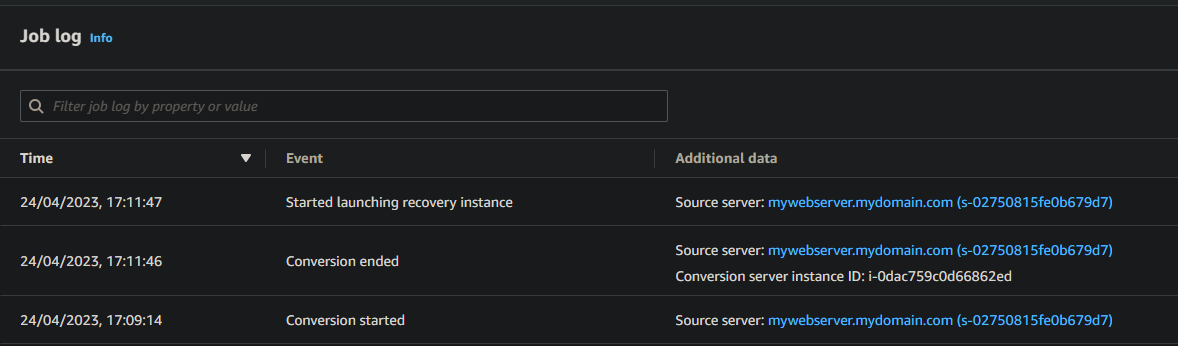
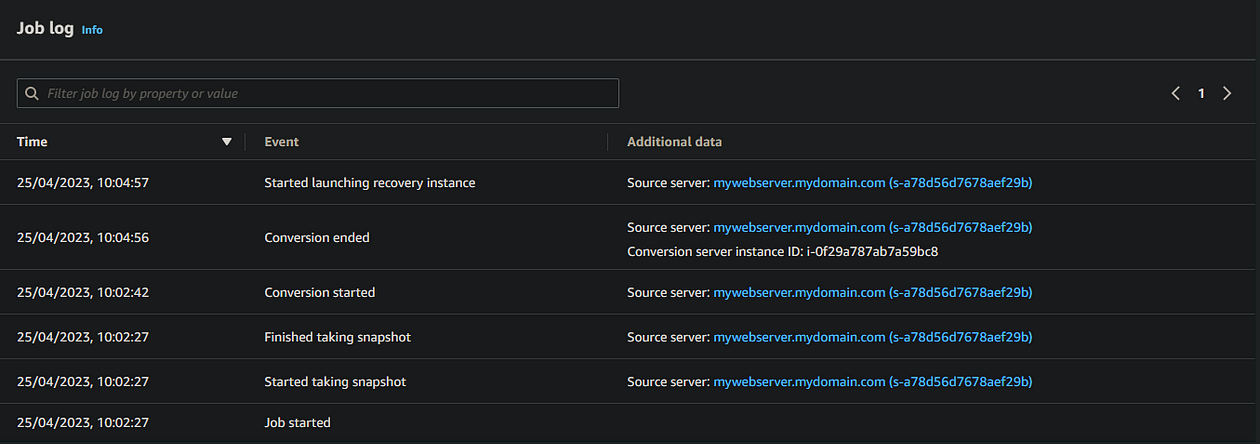
At this point, you’ll see within the Job log that DRS is starting a conversion job. Here, DRS will provision a “Conversion Server”, which will essentially prepare your synchronised data to be applied to a fresh new instance in your failover region. You can see this conversion server within the EC2 console of your failover region


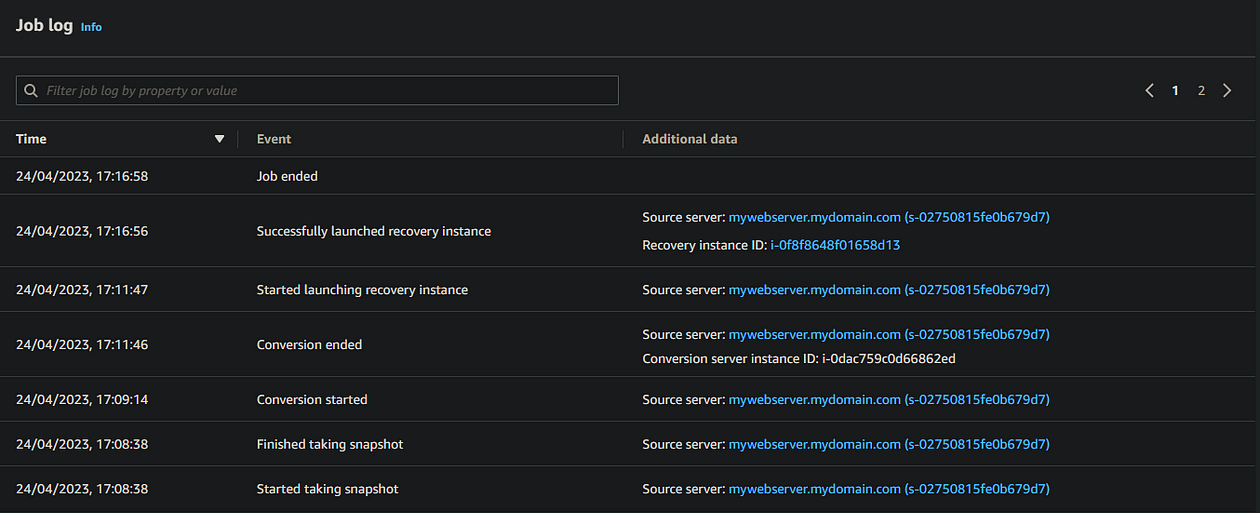
The nice thing about the DRS Job log is that it automatically updates without you needing to hit refresh (Cloudtrail, I’m looking at you!), so you can see in near-real-time the progress of the failover instance (or “recovery instance”, as DRS calls it).
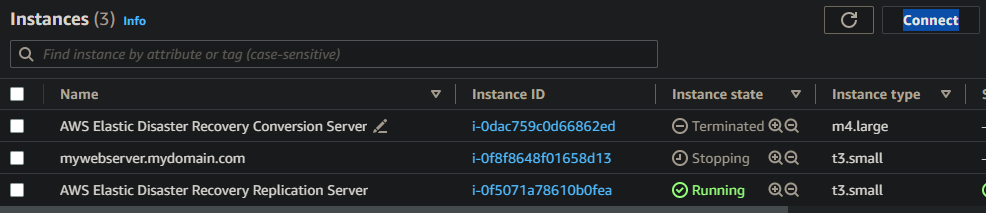
Once the Conversion server has done its thing, DRS will terminate it and proceed with spinning up a fresh t3.small instance to host our replicated data. In my scenario, the conversion server took around three minutes.
With the job log on Started launching recovery instance, you may notice in the EC2 console your failover instance enters a stopping state. This is normal as it needs to reboot during the recovery process. It may stay on this state for a few minutes, but don’t be alarmed.
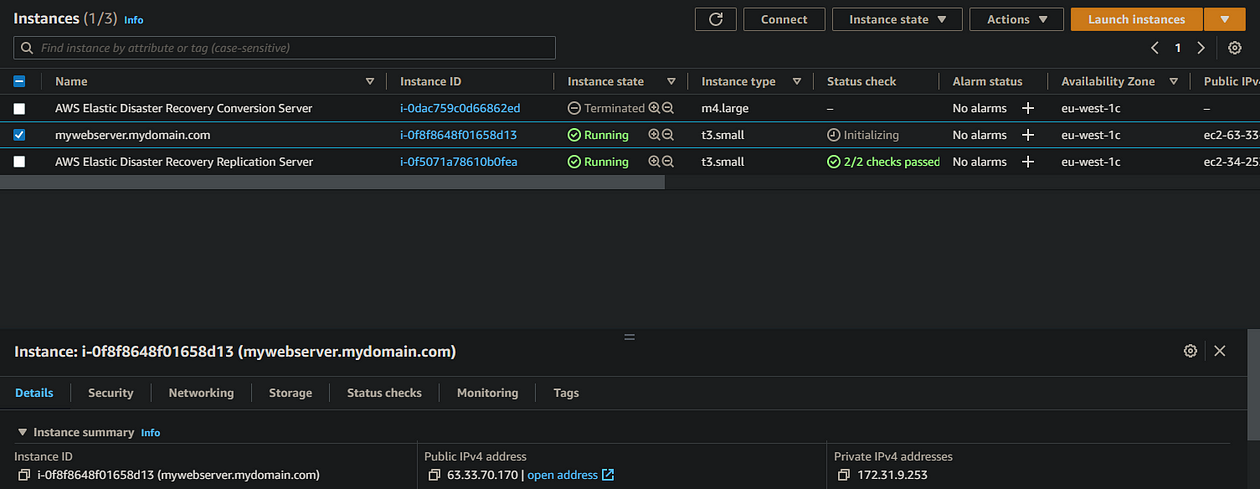
After a few minutes, your recovery instance should be in a running state and ready for testing! If all went well, you should be able to navigate to your failover instance’s public IP address (http, not https, don’t forget!) and see that we have a DR instance in the eu-west-1 region. Excellent!
6. Configuring reverse replication/failback
If you’ve followed along to this point, congratulations! Here’s what we’ve accomplished so far:
- We’ve created a “production” web server in London
- We’ve setup DRS to replicate this server to Ireland
- We’ve assumed a disaster in London, and have invoked a DR procedure by launching a recovery drill to spin up a replacement “production” server in Ireland
- We’ve tested that our replacement server works
If this were a real disaster, we wouldn’t have initiated a recovery drill, we’d have done an actual recovery, and if that was the case, we’d now be in a position whereby we’re running in our failover environment, without a further failover environment to rely on in the event something was to happen in Ireland. Not ideal. However DRS accommodates for this by having reverse-replication capabilities. This essentially allows us to replicate back from our failover region to what was originally our production region, i.e. from eu-west-1 (IRE) back to eu-west-2 (Lon). Below, we’ll set this up.
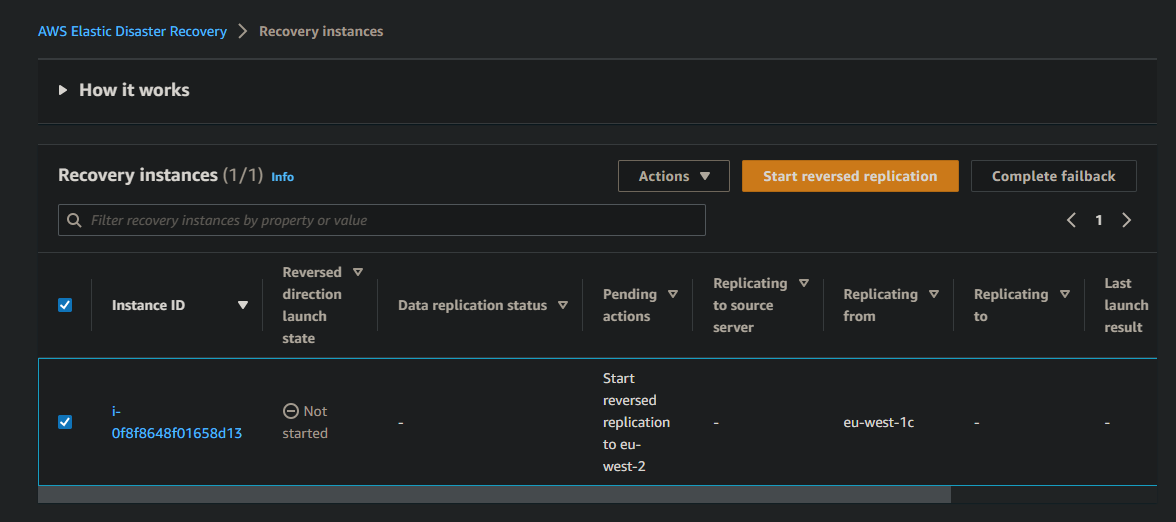
- Head to the DRS Console in your failover region (Ireland, for me), and under Recovery instances, select your recovery instance and click Start reversed replication
Remember, you must have setup DRS in the source region before you launched your recovery instance, in order to failback
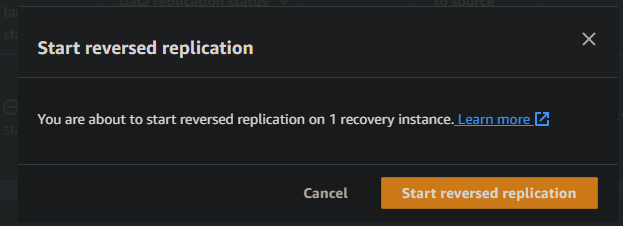
- and accept the prompt
This then begins the reverse sync process, which looks pretty much identical in the console to the original sync process we performed earlier, except this time the details are shown in the Recovery instances tab of your failover region rather than the source servers tab. You can also view the same state in the source servers tab of your source region.


- Over in the EC2 console in your source region (London), you should now see that a new replication server has been provisioned by DRS to handle the reverse replication

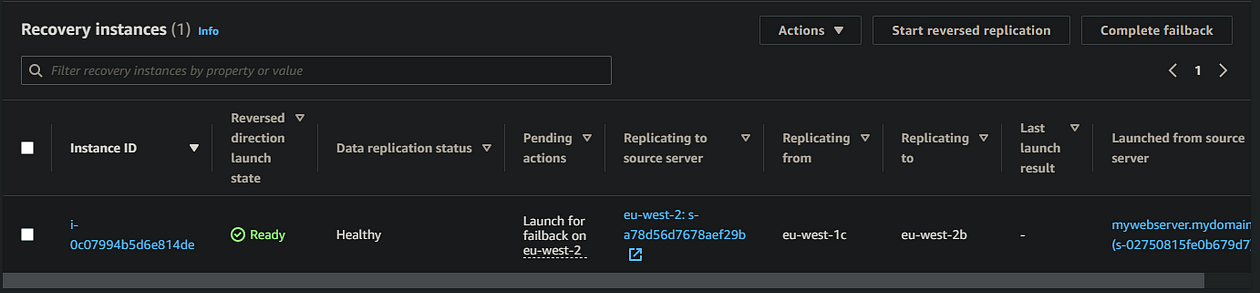
- After 10 minutes or so (depending on your storage size and network), you should now have a recovery instance that’s ready for failback testing
7. Testing failback
So now our recovery instance is ready to test failback, let’s go ahead and give it a try
- Head to the DRS Console > source servers in your source region (London, for me), select your WebServer, and select Initiate recovery job > Launch for failback
You may wish to double check the Launch settings first by selecting Actions > Edit EC2 launch template, to validate the correct IAM profile, instance type, etc.

- Again, we can see a Conversion server launch in our source region, and after a few minutes this will terminate and our failback instance is created and will begin processing the replicated data. Again, don’t worry about your failback instance staying in a
stoppingstate for a while. This will take at least 5–10 minutes, and the progress can be monitored in the Recovery job history tab of your source region

- Once complete, let’s give it a test by navigating to the webpage (http, not https!)
And there we have it! We’ve successfully performed a failover, failback, and tested our webpages to validate. The final step is to clean up our now redundant resources.
8. Cleaning up
Now as this was a recovery drill, and not a real recovery, we’re going to leave our original instance in place with replication enabled. In a real disaster scenario, you’d terminate/remove the original source server as it would no longer be required.
It’s crucial that you perform the below steps in the correct regions, as you may risk terminating your source servers!
- In the DRS console of your source region, having selected the Recover instances tab, select your recently created failback instance, and select Actions > Terminate recovery instances
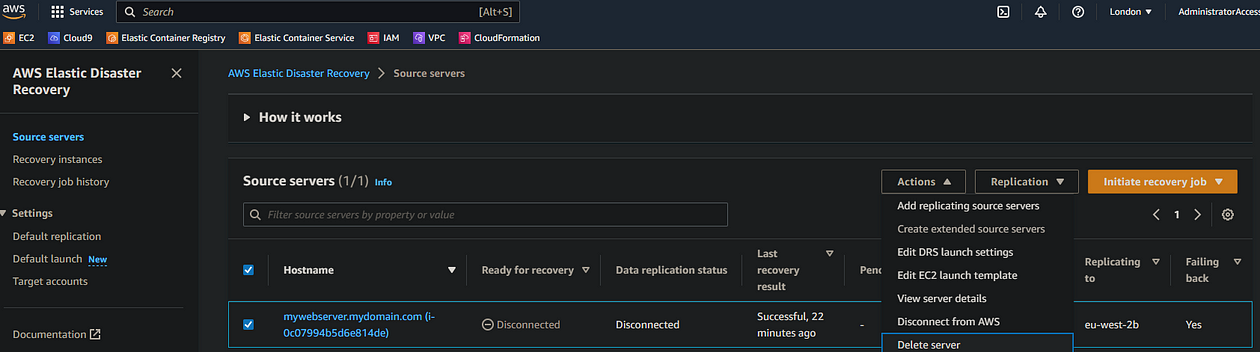
- In the source servers tab of your source region, select your failover instance and select Actions > Disconnect from AWS

- Then in the same region/console, select Actions > Delete server
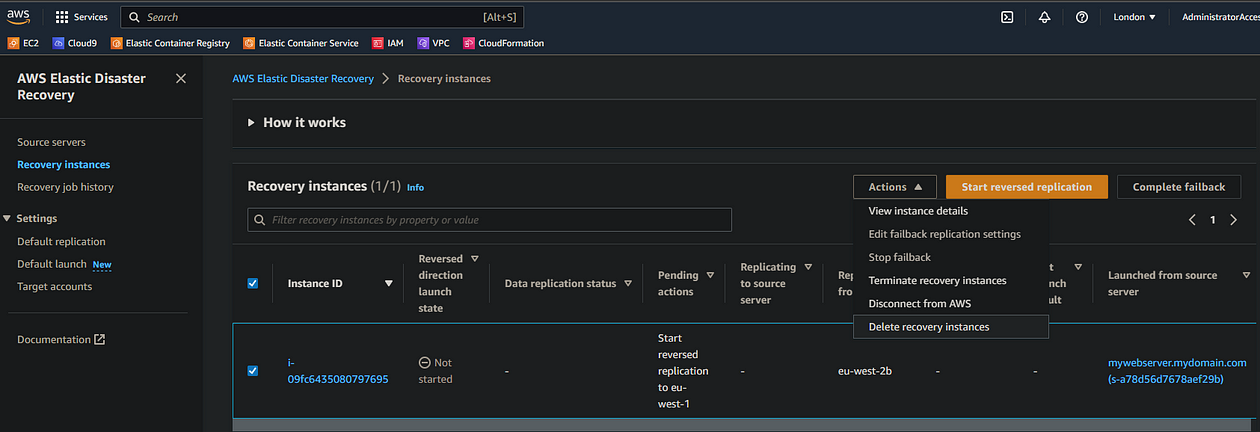
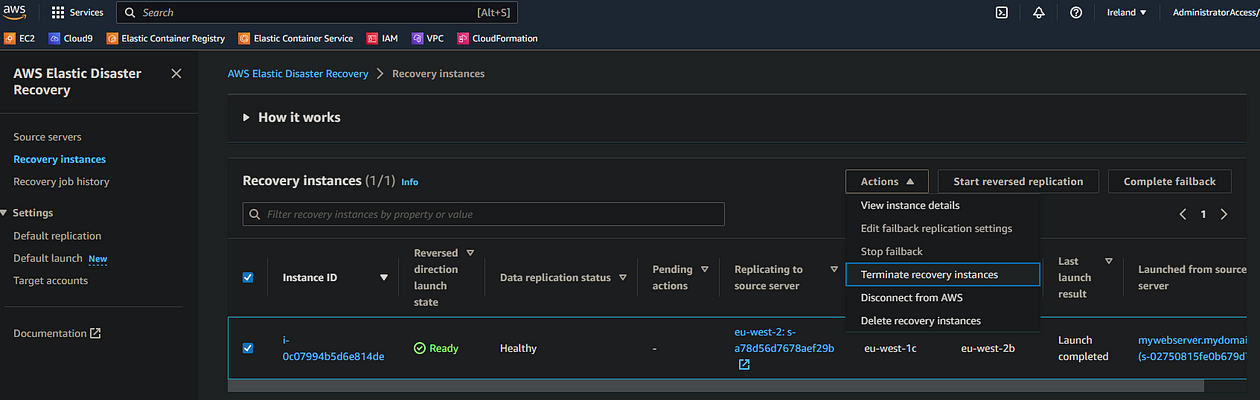
- In the Recovery instances tab of your failover region, select your recovery instance and select Actions > Terminate recovery instances
And in a real life scenario, that would be us finished. At this point, we’re still replicating our original source webserver to our failover region, and would be ready to initiate failover in the event of an actual disaster. However as this is a demonstration, I’m going to continue removing the DRS config below. If you wish to retain this DR setup, then you should stop here. If not, follow on below:
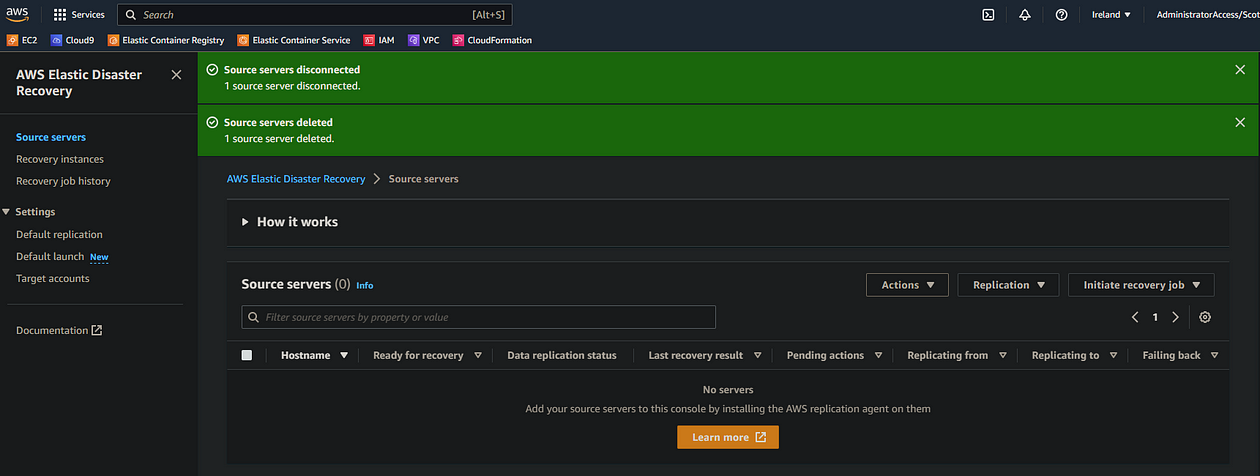
- In the Source servers tab of your failover region, select your source instance and select Actions > Disconnect from AWS
- Then Actions > Delete server
This should leave your DRS console empty as follows:
- Then finally, we can delete our original source instance from the EC2 console in our source region
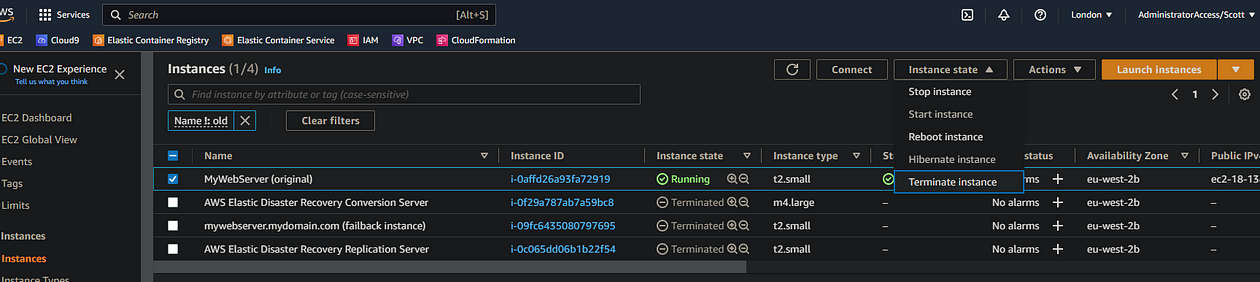
Finally, it’s worth validating that all relevant resources such as replication servers, failover instances, etc. are gone. It can take five minutes or so for replication servers to be removed, as DRS does this automatically after we remove source server config, so you may have to be patient here and try to avoid manually removing them.
And that’s us done. I hope this guide helped with your understanding of Elastic Disaster Recovery Service and its capabilities, and how it can make DR incredibly easy, cost-effective, and customizable.

Leave a Reply